[display-frm-data id=22128]
Archives
Camelot
[{“box”:0,”content”:””},{“box”:1,”content”:”
Camelot<\/h1>
[if 63 not_equal=\”\”]Species – Plumeria rubra<\/em><\/strong>[\/if 63]<\/a><\/p>
[if 267 not_equal=\”\”]<\/a>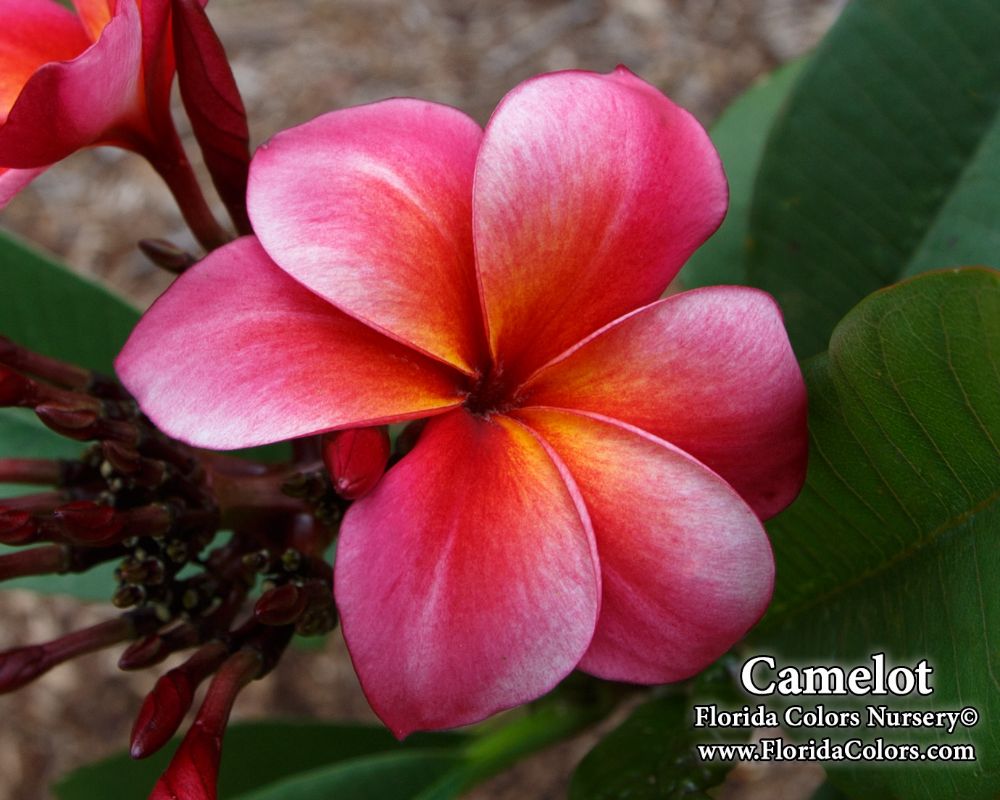 [\/if 267]<\/a><\/p>
This information for Camelot was s<\/a>ubmitted by Tex Norwood, located in <\/a>[if 142 not_equal=\”\”]Homestead, Florida, USA.[\/if 142]
<\/a>[if 143 not_equal=\”\”]Homestead, Florida, USA is in USDA Zone 10B.[\/if 143]
<\/a><\/p>
[if 47 not_equal=\”\”]Camelot may also be know by (AKA Names)\u00a0[\/if 47]
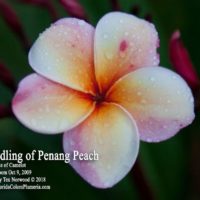
[if 252 equals=\”Yes\”]Camelot was grown from seed by Tex Norwood[\/if 252][if 261 not_equal=\”\”], it’s pod parent is Penang Peach.[\/if 261] [if 482 not_equal=”\”]Camelot, was planted in July[\/if 482][if 483 equals=”\”] of 2006.[\/if 483] [if 484 equals=”\”]Camelot bloomed for the first time in August[\/if 484][if 485 equals=”\”] of 2009[\/if 485]<\/p>
[if 262 not_equal=\”\”]The seed came from Houston, Texas – Eulas Stafford’s Penang Peach tree (the pod parent) in Houston, Texas – Eulas Stafford.[\/if 262]<\/a>[if 260 not_equal=\”\”] and is believed the pollen parent.[\/if 260]<\/a>[if 482 equals=\”Yes\”] Camelot was planted in July[\/if 482][if 483 equals=”\”] of 2006.[\/if 483]<\/a>[if 484 equals=\”Yes\”] Camelot bloomed for the first time in August[\/if 484][if 485 equals=”\”]of 2009.[\/if 485]<\/a>[if 263 not_equal=\”\”]Known Pod Mate(s) of Camelot: Cadbury[\/if 263]<\/a><\/p>
The flower is From 2 1/2″ to 3″ inches in diameter and the color is Rainbow as it appears from about 3 meters away. [if 275 not_equal=\”\”]Camelot has a Mild[\/if 275]<\/a>[if 274 not_equal=\”\”] Spicy fragrance,[\/if 274]<\/a>[if 320 not_equal=\”\”] is a Compact grower[\/if 320]<\/a>[if 321 not_equal=\”\”] with a Medium rate of growth.[\/if 321]<\/a><\/p>
[if 65 equals=\”Yes\”]Camelot is a plumeria discovered by Tex Norwood.<\/a>[\/if 65]<\/a>
<\/a>[if 488 not_equal=\”\”]Camelot was found in [\/if 488]<\/a>[if 486 not_equal=\”\”] of [\/if 486]<\/a>[if 255 not_equal=\”\”] Camelot was found in [\/if 255]
<\/a>[if 256 not_equal=\”\”]It is believed Camelot originated in Florida USA[\/if 256]<\/a>
<\/a>[if 258 equals=\”Yes\”]Camelot is Registered by The Plumeria Society of America<\/a>[\/if 258]<\/a>[if 259 not_equal=\”\”], the registration number is [\/if 259]<\/a><\/p>
The Flower<\/h2>
- [if 264 not_equal=\”\”]The typical flower size is From 2 1/2″ to 3″[\/if 264]<\/a><\/li>
- [if 265 not_equal=\”\”]Flower Color as appears 3 meters away is Rainbow<\/a>[\/if 265]<\/li>
- [if 269 not_equal=\”\”]The center of the flower is considered <\/a>Orange<\/a>[\/if 269]<\/a><\/li>
- [if 469 not_equal=”\”]<\/a>The size of the flower throat is considered Medium<\/a>[\/if 469]<\/a><\/li>
- [if 470 not_equal=\”\”]<\/a>The color of the throat of the flower is considered <\/a>Red<\/a>[\/if 470]<\/a><\/li>
- [if 69 not_equal=\”\”]<\/a>Additional details: <\/a>[69]<\/a>[\/if 69]<\/a><\/li>
- [if 70 not_equal=\”\”]Camelot’s flower Keeping Quality is considered to be <\/a>Good[\/if 70]<\/a><\/li>
- [if 71 not_equal=\”\”]<\/a>Petal Thickness is considered to be <\/a>Average<\/a>[\/if 71]<\/a><\/li>
- [if 73 not_equal=\”\”]T<\/a>he Type of Flower is Obovate: type 5 – rounded tip moderately overlapped<\/a>[\/if 73]<\/a><\/li>
- [if 75 not_equal=\”\”]<\/a>The flower’s Tendency To Fade with sunlight is Little change<\/a>[\/if 75]<\/a><\/li>
- [if 274 not_equal=\”\”]<\/a>The Flower Fragrance is considered to be Spicy<\/a>[\/if 274]<\/a><\/li>
- [if 275 not_equal=\”\”]Flower Fragrance Intensity is considered to be Mild[\/if 275]<\/a><\/li><\/ul>

 <\/a>
<\/a>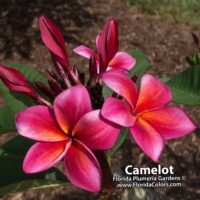 <\/a>
<\/a> <\/a>
<\/a> <\/a>
<\/a>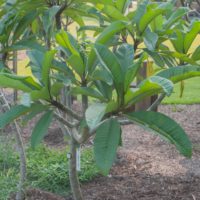


 [\/if 344]<\/a><\/li>
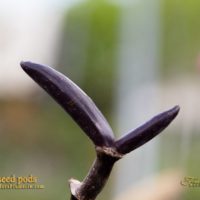 <\/a>
<\/a>Bat Guano: The Plumeria Superfood Rich In Macro And Micronutrients
Bat Guano: The Plumeria Superfood Rich In Macro And Micronutrients
Guano has a long history as a high-performance organic fertilizer. When you see the benefits of guano on plumeria, you will immediately comprehend why wars have been fought and fortunes have been made and lost because of guano.
WHAT IS GUANO?
Bats are very social creatures. These adorable little mammals form large colonies that share the same cave for generation after generation. Over the centuries, dunes of excrement build upon the floor of the roost cave, becoming compost. What results is guano, called “wanu” by the ancient South American Quechuans.
Guano is a plant superfood that is rich in the three essential plant nutrients, nitrogen, phosphorus, and potassium. Nitrogen ensures vigorous and verdant growth during the vegetative cycle. Phosphorus supports healthy flowering and root growth. Potassium ensures sturdy trunks and branches. Guano also contains a complete range of micronutrients for overall healthy plant development.
The diet of the particular bat species can alter the nutrient profile of the guano. Insect-eating bats produce guano that has a high nitrogen content. This makes it ideal for fertilizing during the vegetative phase. Fruit-eating bats produce guano that has a high phosphorus content. This is best for use during the flowering phase when plumeria has a higher demand for phosphorus.
Guano is ideal as an organic soil amendment, either dug-in around the plant or watered-in as a tea. It makes an ideal backbone to any soil recipe and has the unique characteristic of never burning plants, unlike most nutrients. Fruits and vegetables grown with guano are more flavorsome and resistant to disease. It is the same with plumeria. Guano will “mango” or sweeten the bouquet and flavor of buds when dry.
HOW TO USE GUANO:
1. AS AN ORGANIC SOIL MIX WITH BONE MEAL AND CHICKEN MANURE
Use guano as part of an organic soil mix from the start. Along with the bone meal, chicken manure, feather meal, and rock dust, guano provides a broad spectrum of essential nutrients, vitamins, and minerals for a plumeria.
2. WATERED-IN AS A TEA
Probably the most convenient way of adding guano to your garden. Here’s a recipe:
- Use 1 tablespoon of guano per liter of water
- Use warm water, not hot! You will kill the microorganisms
- Stir the water as you add the guano
- Leave to rest overnight
- Use once per week to guarantee lush growth
3. APPLIED DIRECTLY AS A SOIL AMENDMENT
Add guano to the soil for a boost in plumeria performance. Here’s how:
- Dig it in (under the mulch) so that it activates properly
- It will dry, clump, and not work as effectively if only sprinkled on the surface
- Water-in well

WHY IS GUANO GOOD FOR PLUMERIA?
The savvy contemporary plumeria grower is learning to use high-quality organic fertilizers.
The benefits of guano for plumeria growth are numerous:
- It improves soil texture. If the soil is too loose, guano will bind it better and increase water retention. If the soil is too dense, guano will loosen the texture and let water penetrate more efficiently.
- Bioremediation. Guano can help flush toxic elements from the soil while protecting the roots microbially and continuing to feed the affected plant.
- It encourages the healthy decomposition of exhausted material. Adding guano to compost speeds up the composting process and improves friability.
- It is a slow-release fertilizer. Guano will provide nutrients for most of the life of your plant.
- It is a pH adjuster, buffering the pH of the root system.
- It controls nematodes and is a natural fungicide against chitin (from insect shells).
- It keeps soil friable and acts as a soil conditioner. Guano adds beneficial enzymes and microflora for continuous soil health.
- When combined with other additives like worm castings and various meals, guano helps create thriving colonies of root fauna.
- Used as a dilute spray, guano can help provide plants with fungal protection.
GUANO HAS A LONG HISTORY
Guano has a long and interesting history as one of the most prized fertilizers in the world. Since well before the arrival of Europeans, guano was a revered fertilizer by the Incas and older South American cultures. It was so important that Incan rulers divided the guano-bearing islands among the provinces. How much could be mined and when were strictly regulated.
Between 1806 and 1841, guano caused astonishment and trepidation in European and new-American farmers. This horticultural curiosity caused such huge and healthy plant growth that it was feared the soil may be depleted irreparably. Within a few years though, it was in great demand by every farmer in the world.
Two million tonnes were imported by Britain from 1840 onwards, and the government of the United States made it a matter of agricultural necessity. During his tenure, President Fillmore said “Guano has become so desirable an article to agricultural interests in the US that it is the duty of the Government to employ all means properly in its power for the purpose of causing this article to be imported into the country at a reasonable price”.
Massive fortunes have been won and lost over the centuries from guano mines. In the mid to late-nineteenth century, it caused a mania, not unlike the California gold rush. Over a forty-year period, Peru exported over twenty million tonnes of guano around the world for a profit of two billion dollars.
Rich in essential macro and micronutrients, bat guano is an organic superfood that will delight the contemporary plumeria grower. For naturally flourishing plants, guano is an unbeatable addition to any organic growth, both indoors or outdoors.
Plumeria Submission Form
PLUMERIA SUBMISSION FORM
(Click to review the Characteristics Page form more detailed information on each Characteristic)
[formidable id=3]
Using Honey In Plumeria Cultivation
Using Honey In Plumeria Cultivation
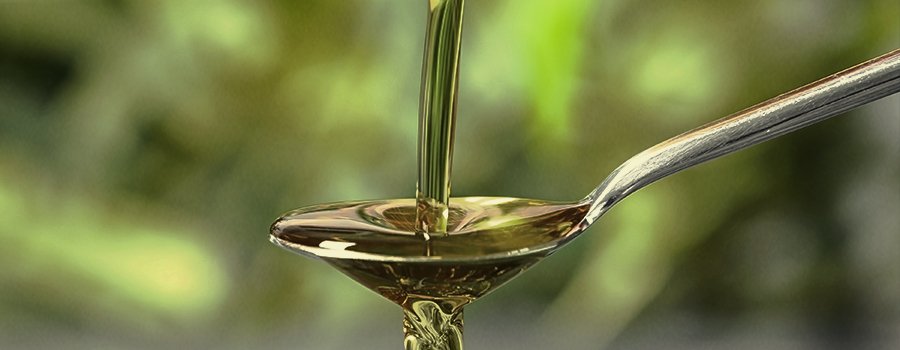
Looking to clone a certain special plumeria plant? Do you need new and innovative forms of fertilizer? Honey could be just the organic ingredient you need to refine and improve your plumeria growing methods. Honey has powerful and unique properties which could make it the perfect addition to your gardening toolbox.
Have you ever wondered how you might make your plumeria crops a little sweeter? Consider adding some honey into the mix.
It turns out that honey can play a useful role in plumeria cultivation in several different ways: it can be used as a rooting stimulant for cuttings and can act as a fertilizer. We’ll examine these applications one by one. Make sure that when you buy honey, you pick a variety that’s 100% pure, and doesn’t contain any corn syrup—your plumeria plants don’t need any of that.
USING HONEY AS A ROOTING STIMULANT
Cloning is when you take a plant you love and use its cuttings to produce a genetically identical copy. Cloning can be useful if you have a strain you really like, or an environment perfectly suited to a particular plant’s genetic profile.
For a cutting to become a new plant, it has to be activated by a rooting hormone. Plants produce their own rooting hormone, so if you take a cutting and place it in a glass of clear filtered water, it should start growing roots on its own. That being said, if you want to improve your odds and speed up the rooting process, you may want to consider an exogenous rooting hormone.
Auxins are the most common type of rooting hormone found in plants. Indole acetic acid (IAA) is the kind produced endogenously. Most commercial rooting products don’t use IAA but a synthetic rooting hormone, like indolebutyric acid (IBA) or naphthaleneacetic acid (NAA). These tend to work well, but can have a short shelf life and many growers don’t want to expose their crops to chemicals.
For those who would rather keep things organic, honey can act as a natural rooting stimulant. It can also be a useful addition to those who are using synthetic rooting hormones and want to add an organic booster. Honey has powerful antifungal and antibacterial properties, so it’ll prevent your root from getting infected. Some growers believe that honey has special enzymes which encourage root growth. Honey has a long shelf life, so if you buy a special jar for gardening, you can use it for years.
To use honey as a root stimulant, coat the “wound” of your cutting in a thick layer of honey and place it in a growth medium. Growers using honey as a rooting agent can expect the roots to begin forming after 7–14 days.
USING HONEY AS FERTILIZER
Once your plant is fully grown, you may expose it to honey again—this time in the soil!
Plants themselves have no need for glucose, as they produce their own glucose through photosynthesis. That being said, the microflora in the soil can be enriched by it. Soil is full of good bacteria and fungi, and a little bit of honey can help them prosper. Dissolve 5–15ml of honey in a gallon of water, and use this to water your plants. Be careful not to “overload” your soil with honey, as this can backfire and cause damage. Some growers brew their own fertilizer by combining honey, amino acids, milk, yucca extract, volcanic ash, and soap bark extract.
Plumeria can benefit from honey, and happily, honey can benefit from plumeria as well—farmers report that hemp pollen is a valuable resource for bees. Further, honey and weed can combine to form an excellent tincture. It seems these two substances get along on many levels, which works out well for the rest of us.
Germinating Old Plumeria Seeds
Germinating Old Plumeria Seeds
When your old plumeria seeds don’t want to germinate, one of these four techniques could come to their—and your—rescue. Aging seeds are more difficult to grow than fresh ones and we’ll explain what you can do to help germination.
The older a plumeria seed gets, the harder it is to germinate. But hard doesn’t mean impossible. If you’ve been saving your seeds for a rainy day and it finally started pouring, these tips could help you get most, if not all, of your old seeds to germinate.
1. PRE-SOAK WITH SUPPLEMENTED WATER
As plumeria seeds age, their protective outer shell hardens and prevents water from passing through. Unless the tiny, dormant embryo that lives inside the shell detects moisture, it doesn’t know that the conditions are right to sprout. As a first step, pre-soak your old plumeria seeds for about 12 hours to see if that does the trick.
To improve your chances, use carbonated water and/or add one of these supplements that help with water absorption. Fulvic acid and most boosters also give your seeds a light dose of nutrients.
- Fulvic acid
- Germination booster
- Hydrogen peroxide
- Gibberellic acid
Keep the water warm, but not too hot. Aim for around 22°C. Avoid direct sunlight, and keep an eye on the glass. Do not soak seeds for prolonged periods, more than 24 hours can deprive them of oxygen and make them drown.
2. SCARIFICATION
Scarification, or scuffing the shell, can also help water pass through an older seed’s tough outer shell.
To scarify your seeds, line a matchbox or other small container with sandpaper. Drop the seeds inside, shake vigorously for 30–60 seconds, then remove. You may not notice much of a difference, but the small micro-abrasions are sometimes enough to let water breach the shell and trigger germination.
3. REMOVE THE RIDGE
The seed’s shell is made up of two pieces, with a seam going all around. The side that’s raised more than the other is the ridge. A hardened ridge can make it difficult for the seed to open. To remove the ridge, run a sharp blade along the ridge on both sides. Handle gently and it should come off without damaging the inside of the seed.
Removing the ridge not only makes it easier for the seed to open, but it also helps with water absorption.
4. SLICE THE SEED
In a life or death situation, surgery may be the only option. Meaning—only do this if nothing else has worked because this technique ruins as many seeds as it saves.
- Remove the seeds from any moisture and allow them to dry out completely.
- Use a sterile scalpel to slice into the seed at the seam and open it slightly.
- Try to germinate it again.
THINGS TO REMEMBER
If you’re going to keep seeds for more than a year or two, proper storage will dramatically increase the chances of late-stage germination. Place them in an airtight container. Keep them in a cool dry location out of the sun. If excess moisture is a concern, add silica gel packs to the container.
As you proceed through these steps, the risk of damaging your seeds past the point of recovery increases. Between each suggestion, give them a few days to a week to germinate. Allow the outside to dry each time to prevent rot. Do not try all or multiple techniques at once.
In the future, consider growing your seeds before they get a chance to get old. They’re not cheap, so letting them go bad is a waste in all kinds of ways.