Growth Responses

Growth Responses

A plant’s sensory response to external stimuli relies on hormones, which are simply chemical messengers. Plant hormones affect all aspects of plant life, from flowering to fruit setting and maturation, and from phototropism to leaf fall. Potentially, every cell in a plant can produce plant hormones. The hormones can act in their cell of origin or be transported to other portions of the plant body, with many plant responses involving the synergistic or antagonistic interaction of two or more hormones. In contrast, animal hormones are produced in specific glands and transported to a distant site for action, acting alone.

Plant hormones are a group of unrelated chemical substances that affect plant morphogenesis. Five major plant hormones are traditionally described: auxins, cytokinins, gibberellins, ethylene, and abscisic acid. In addition, other nutrients and environmental conditions can be characterized as growth factors. The first three plant hormones largely affect plant growth, as described below.

Auxins

The term auxin is derived from the Greek word auxein, which means “to grow. ” Auxins are the main hormones responsible for cell elongation in phototropism and gravitropism. They also control the differentiation of meristem into vascular tissue and promote leaf development and arrangement. While many synthetic auxins are used as herbicides, indole acetic acid (IAA) is the only naturally occurring auxin that shows physiological activity. Apical dominance (the inhibition of lateral bud formation) is triggered by auxins produced in the apical meristem. Flowering, fruit setting and ripening, and inhibition of abscission (leaf falling) are other plant responses under the direct or indirect control of auxins. Auxins also act as a relay for the effects of the blue light and red/far-red responses.

Commercial use of auxins is widespread in plant nurseries and for crop production. IAA is used as a rooting hormone to promote the growth of adventitious roots on cuttings and detached leaves. Applying synthetic auxins to tomato plants in greenhouses promotes normal fruit development. Outdoor application of auxin promotes synchronization of fruit setting and dropping, which coordinates the harvesting season. Fruits such as seedless cucumbers can be induced to set fruit by treating unfertilized plant flowers with auxins.

Cytokinins

The effect of cytokinins was first reported when it was found that adding the liquid endosperm of coconuts to developing plant embryos in culture stimulated their growth. The stimulating growth factor was found to be cytokinin, a hormone that promotes cytokinesis (cell division). Almost 200 naturally occurring or synthetic cytokinins are known, to date. Cytokinins are most abundant in growing tissues, such as roots, embryos, and fruits, where cell division is occurring. Cytokinins are known to delay senescence in leaf tissues, promote mitosis, and stimulate differentiation of the meristem in shoots and roots. Many effects on plant development are under the influence of cytokinins, either in conjunction with auxin or another hormone. For example, apical dominance seems to result from a balance between auxins that inhibit lateral buds and cytokinins that promote bushier growth.

Gibberellins

Gibberellins (GAs) are a group of about 125 closely related plant hormones that stimulate shoot elongation, seed germination, and fruit and flower maturation. GAs are synthesized in the root and stem apical meristems, young leaves, and seed embryos. In urban areas, GA antagonists are sometimes applied to trees under power lines to control growth and reduce the frequency of pruning.

GAs break dormancy (a state of inhibited growth and development) in the seeds of plants that require exposure to cold or light to germinate. Abscisic acid is a strong antagonist of GA action. Other effects of GAs include gender expression, seedless fruit development, and the delay of senescence in leaves and fruit. Seedless grapes are obtained through standard breeding methods; they contain inconspicuous seeds that fail to develop. Because GAs are produced by the seeds and because fruit development and stem elongation are under GA control, these varieties of grapes would normally produce small fruit in compact clusters. Maturing grapes are routinely treated with GA to promote larger fruit size, as well as looser bunches (longer stems), which reduces the incidence of mildew infection.

Plumeria Seed Pods

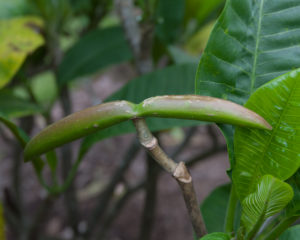
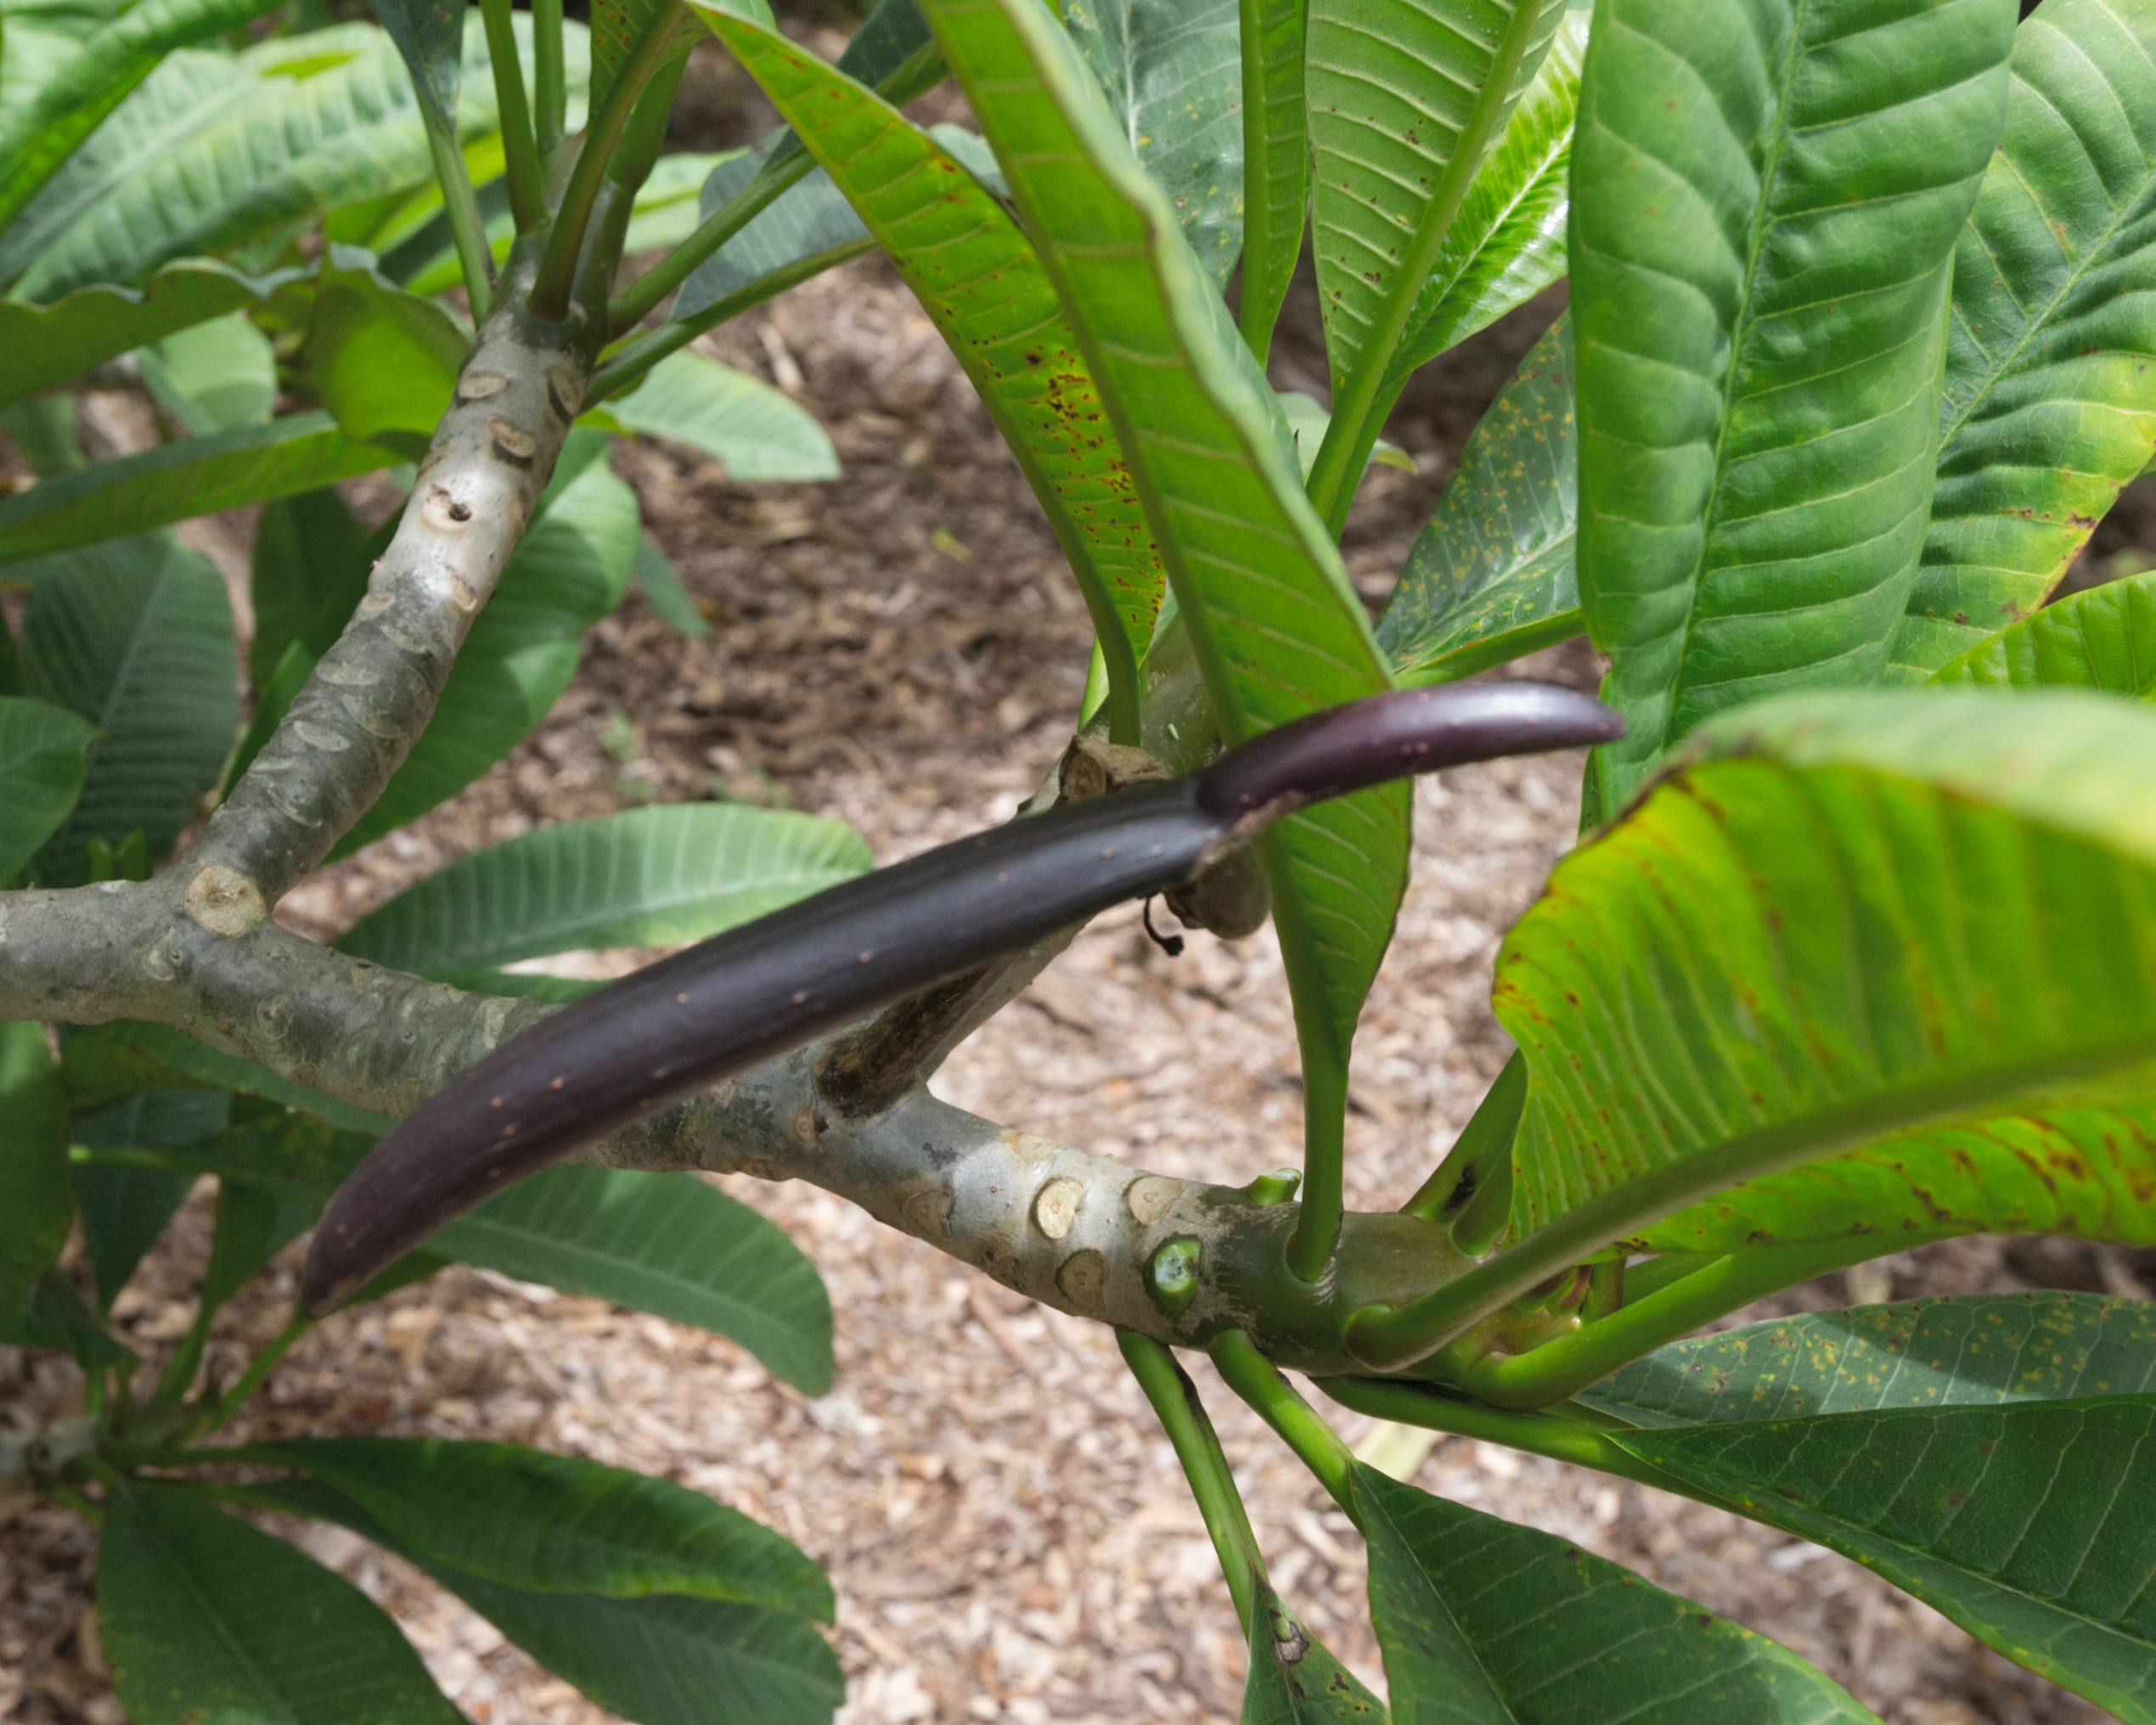
Plumeria seeds form when a flower is pollinated either by the wind (self pollination) or by an animal, hummingbird, butterfly, thrip, sphinx moth, tiny ants or by human. Once pollinated, plumeria flowers will fade and begin to grow into seed pods. Plumeria seed pods grow from flowers pollinated during the previous growth season. A single pod may contain from 25 to 60 seeds and usually grow in pairs. When the seed pod is growing you can wrap it loosely in cheesecloth to catch the seeds when it splits open. Do not wrap it so tightly that you block the circulation of fresh air.

Plumeria seed pods take about 9 months to mature. After they mature they will crack open and the seeds will be disbursed by the wind. If you harvest before they are ready, the seeds won’t have a chance to mature properly and most likely will not be viable. 

Collecting Seed pods

Seed pods look like two long beans. They can be green or light brown to dark brown. Different cultivars will product different looking and sizes. From the time they start growing to the end of their growth, they may reach 12 inches long or more. Seed pods will continue to grow over winter storage while their plumeria is in dormancy. So watch them during the winter, the growth is slower, but they could still open if they mature during winter storage. 

Open Seed PodThornton's Lemon Drop Plumeria Seed Pod

When the pod start to discolor and look like they are dying, they are getting ready to open. When you see the seam along the seed pod start to crack, it’s time to cover. A netting material or stocking is good to cover the seed pod and capture the seeds. The netting will allow them to continue to receive water and sunlight through the openings. Place the netting or stocking over the seed pod giving it plenty of room to breath and open fully.

Most plumeria seed pods open during the spring, but the seed pods will open all year long, depending on when the bloom was pollinated. Once they have opened, your cover will catch the seedlings. It is ok, to pick the pod if it has started cracking open. Place in a cool dry place and it will fully open in a few day. After it opens allow the seeds to dry out for a few days. Moisture can cause bacteria or fungus to grow.

After they have dried you may either store them in a dry dark place or plant the seeds. Some plumerias are great seed pod producers, some may only produce a few a year while other may never or very seldom produce seed pods. Some seed will do better if you plant right away. Seed Pods have been know to stay viable for 10 or more years, but the average is more like 3 years. Regardless the seeds germination rate will decrease over time.

Plumeria Seed Pods

A Guide to Growing Plumeria From Seed

A Guide for Growing Plumeria From Seed by Tex Norwood

This guide shares the basic methods I use for growing plumeria from seed, caring for seedlings, and the products I use. I hope this guide helps you with your seed goals for the year.

There are many proven methods to growing plumeria from seed and you should examine to see if any could help you develop a method that works for you. This is only a guide and should be adjusted to your seed growing environment.

When I have a batch of seeds, I examine what I did in the past and determine if I can make any improvement. The following is my detailed plan for growing plumeria from seed in 2018. This plan covers from germination until they first produce blooms.

Please keep in mind your growing environment and the differences from South Florida Zone 10B. The start of your plan should correspond to when you are past the threat of a frost or freeze. You should also make plans to protect your plumeria from cold weather, just in case you have a late freeze or frost. 

My goal is to know what, when, and why, so I can improve my method every year or even with each batch. Documenting all adjustments as you go will allow you to look back and better determine where you can make improvements.

Why do I grow seedlings?
          1. To grow new and exciting cultivars
          2. To grow rootstock for grafting
          3. But most of all to see that one-of-a-kind flower for the first time.

Using the methods and products below; I have been able to get about 10% of my seedlings to bloom in less than 12 months and about 60% to bloom in 18 to 24 months. The majority of the remainder bloom from 24 to 36 months. (Some do still take 3 years and even longer.)

What you will need: Plumeria Seeds, something to soak them in, paper towels, 2” x 3” Gro-Tech FlexiPlugs and trays or plugs or good seedling soil mix to plant the seeds in, Vitazyme, Carl Pool’s Root Activator, Bioblast 7-7-7, Pro-Mix BX Mycorrhizae, Excalibur VI 11-11-13, Labels and permanent felt tip marker. Hydrogen Peroxide is good to use for mold or fungus.

Seed selection

Seed selection is very important when growing plumeria seeds. Plumeria Rubra seeds do not produce true to their parents. Sometimes a seedling will look like its parent, but it will never be exactly the same.  A few characteristics to consider:

  • Flower: Color, size, keeping quality (how long it lasts after picking), fragrance, etc.
  • Tree: Growing habit, size, etc.
  • Leaves: Color, size, etc.
  • Blooming: Quality, size of inflorescence/flower stalk, number of flowers blooming at the same time, how long does it bloom, etc.

I’m always trying to improve my chances of getting that spectacular plumeria seedling.

If possible:

  • Select a pod parent that is known to produce the characteristics you desire or at least a pod parent that has the characteristics you desire.
  • Obtain seeds from trusted growers.
  • Find out the history of the pod, e.g., What’s growing close to the pod? Did they bloom at the same time? Was it cross-pollinated, manually pollinated, or pollinated by nature?
  • Obtain all the seeds from a pod when possible.
  • Select seeds from a healthy tree.
  • Select seeds that are plump and look healthy.

Before you plant your seeds

Soak plumeria seeds to test the viability and soften the shell to give them a kick start.

When: Plumeria seeds germinate best in the spring, but can be germinated any time if provided with enough moisture and warmth staying above 60 degrees.

What: Use quality seeds, warm water, and Vitazyme

How: 

  1. First, examine each seed by placing it between two fingers. If they have some thickness, they most likely are viable. If they feel paper-thin, they most likely are not viable.
  2. For faster germination and rooting, dilute Vitazyme with warm water at a rate of 1 oz to 19 oz of water, a 5% solution, and dip or mist both sides of the seed. Allow seeds to dry prior to planting or soaking.
  3. For a soaking mixture, dilute Vitazyme with warm water at a rate of about 1.29% or 1 oz to 128 oz (1 gallon).
  4. Place your seeds in the container, place in a warm area, and allow to soak for approximately 4-6 hours (or even overnight). Soaking longer than overnight could cause damage to the seeds. Seeds that are very thin and are still floating are most likely not viable. To further test this, plant all the seeds, but mark the ones that did not sink.
  5. Check your seeds after several hours to see which seeds are absorbing enough liquid to allow germination and to sink to the bottom.
  6. Do not allow your seeds to dry out before you plant them.
  7. Now your seeds are ready to plant.

Why: 

  1. To soften the seed’s protective coating
  2. To allow the seed to absorb as much water as possible
  3. To test the viability of the seed
  4. To provide nutrients as early as possible, helping germination and starting the rooting process sooner

Preparing Plugs

When: Prior to planting seeds in plugs.

What: 2”x3” Grow-Tech peat plugs, warm water, Root Activator, and Vitazyme.

What we suggest: A mixture of warm water, Vitazyme, and Carl Pool’s Root Activator.

How: Soak your plugs in a mixture of 1 gal of warm water, 2 oz Root Activator, and 1 oz Vitazyme for about 2 hours.

Why: Vitazyme is a bio stimulate with vitamins that help the overall health of the seeds and the Root Activator adheres to the plugs or soil and gives the roots a kick-start. I use the plugs because they hold the right amount of moisture and provide ample aeration that allows the new roots to breathe.

Watering: Keep your plugs wet or leave them soaking until you are ready to plant the seeds.

Planting your seeds

When: Plant your seeds right after soaking into the prepared plugs. DO NOT allow either to dry out. If they dry out they could be damaged.

Plugs, Pots, or Trays, After Soaking, For the seeds, I grow for new cultivars, I prefer planting the seeds directly into 2″ x 3″ Grow-Tech FlexiPlugs, a foam peat plug. For the seeds, I’m growing for rootstock in flat trays or 4″ pots.

What: Carefully selected plumeria seeds, 2”x3” Grow-Tech FlexiPlugs. Warm water, Root activator, and Vitazyme. You will also need a 36-hole tray and a flat for the plugs. A cover is optional.

Why: The reason I use the plugs is they hold moisture allowing me to keep them soaked with water and still providing ample aeration and allowing the new roots to breathe. I use the 2” x 3” FlexiPlugs that allows me up to 14-21 days before I have to transplant to pots.

Watering – I grow Plumeria seeds in full sun and water 2-3 times a day depending on the weather. My goal is to keep the plugs very moist to the touch. I have had no damping off or rotting problems with this method.

Start Fertilizing – Foliage

When: Before transplanting the plugs into pots, after three or four true leaves have grown. I use the same mix ( see below) approximately every two weeks

What:  BioBlast 7-7-7 NPK fertilizer, Vitazyme

How: Foliar feeding early in the morning or late in the evening with Bioblast at 1 tablespoon per 1 gallon of water and Vitazyme at 1 tablespoon per gallon. Do not spray in the hot sun it will burn the seedling leaves.

Why: Seedlings have seed leaves that provide them with nutrients for the first few weeks of their life, but when the seed leaves dry up and fall off the seedling needs nutrients. Bioblast works with every part of your plant. Soil organisms are invigorated with Vitazyme bio-stimulants providing quicker, more vigorous growth. Roots are encouraged with our Root Activator. A balanced 7-7-7 NPK provides the essentials of plant growth and structure. B-Vitamins and Zinc encourage a robust immune system, while Iron promotes chlorophyll production in the leaves.

Watering – I continue to grow Plumeria the seedlings in full sun and water at least 2-3 times a day depending on the weather. My goal is to keep the plugs moist to the touch. I’ve had no damping off or rotting problems.

Transplanting to Pots and Fertilizing

When: As soon as I see roots sticking out of the plugsPlumeria seedling roots coming out of the Plugs grown from seed, transplant into larger pots. Normally I will use 1 gal pots, but this year I’m using 7.5 gal squat pots. Approximately 14 days after planting in the plugs.

What: ProMix BX Mycorrhizae, Excalibur VI 11-11-14 with micronutrients, Vitazyme, and Root activator.

How: Fill 1 gal. pot with a mixture of ProMix BX Mycorrhizae mixed with 2 tablespoons of Excalibur Vi. Fill a 7 1/2 gal. squat pot with ProMix BX Mycorrhizae or the mix of your choice, dig an area our in the mix about the size of a 1 gal pot, port the contents of the 1 gal pot in the hole, then punch a hole about the size of the FlexiPlug (about 2″x3″) in the center of the filled 7 1/2 gal pot. Place the plug in the hole and press the mix firmly around the plug. Water in well with a mix of Vitazyme 1 oz to 1 gal and Root Activator 2 oz to 1 gal. You may need to add more soil mix if the plug is not covered completely with at least ½” of the mix. Water again the next day and then when the soil is almost dry. I would suggest using a water meter from time to time to verify the moisture content. It is very important the soil does not stay wet.

Why: Promix BX contains Mycorrhizae and is a fast-draining mix. The Excalibur VI, a 6-month granular slow-release fertilizer designed specifically for plumeria that provides all the nutrients a seedling needs to grow strong. Vitazyme a bio-stimulate helps the overall health of the seedlings and the Root Activator adheres to the soil and is there to help the roots develop and grow faster.

Watering – Water once a day for the first two days, then water when the soil is barely moist. At this point, I check with a moisture meter and water when on the low side of moist. It is important not to overwater, keeping the excess soil mix from becoming water-soaked. It is also important not to allow the root zone to become dry.

Fertilizing – Throughout the growing season

When: Apply Excalibur VI every six months, Foliar feed every two weeks to every month with BioBlast.

What: Excalibur VI 11-11-13, BioBlast 7-7-7, Vitazyme and Carl Pool’s Root activator

How: After 6 months, I spread 3 or 4 tablespoons of Excalibur VI on the top of the soil and mix in the top 1-2” of the soil. The seedling should still be in the 7 1/2 gal squat pot. Foliar feed with BioBlast 1 oz to 1 gallon and Vitazyme 1 oz to 1 gal every month or less. Drench with Vitazyme and Root Activator in the Early Spring or if transplanting.

Why: Excalibur provides a balanced slow-release fertilizer specifically designed for plumeria.  BioBlast works with every part of your plant. Soil organisms are invigorated with Vitazyme bio-stimulants providing quicker, more vigorous growth. Roots are encouraged with our Root Activator. 

If possible, do not let seedlings go dormant their first winter. You can treat seedlings as adult plumeria after the first growing season.

Keep looking for more space, they will grow!
A Guide to Growing Plumeria From Seed

A Guide to Grow Plumeria from Cuttings

Propagation by cuttings is the most commonly used method to propagate plumeria, a cutting will produce an exact clone of the parent plant. Normally plumeria cuttings are quite easy to root if done in the Spring and Summer. All plumeria cuttings will root under perfect conditions, some take longer than others. Do your research so you are aware of the hard to root cultivars. Some hybrid plumeria can be more difficult to root. 

The most common mistakes are over watering and trying to root late in the growing season. For difficult to root plumeria cuttings you can use a grow or heat mat placed under the pots to encourage new root growth. Plumeria roots grow best when the root zone temperature is between 75 and 85 degrees.

The fertility status of the donor plant can influence rooting. Avoid taking cuttings from plants that show symptoms of mineral nutrient deficiency. Conversely, plants that have been fertilized heavily, particularly with nitrogen, may not root well. The stock plant should not be under moisture stress. Cuttings from lateral shoots often root better than cuttings from terminal shoots.

There are many good methods developed for starting cuttings. You can find some good articles on cuttings with various methods on Plumeria.Care. Which one works best for you will depend on the time of year and your climate.

Rooting Plumeria Cuttings in Soil

Below is a guide to start your plumeria from cuttings. What are Plumeria Cuttings, Rooted Plumeria and Grafted Plumeria.

  • When to take cuttings? Although you will eventually wind up with broken branches at different times of the year, the time of the year is important to your cutting survival chances. Different regions have different length of growing season. 
    • Spring is the best time to start plumeria cuttings, when the are waking up from dormancy.
    • Early to Mid Summer is also good time. Late summer is ok. The later you start a cutting the less chance you have to correct problems you may have.
    • Early Fall or later does not give your cutting a chance to put on a good root system to survive the first winter unless you extended the growing season with lights and bottom heat.
  • When taking cuttings it is important to decide the reason you are taking the cuttings.
    • Will you root the cutting yourself?
    • Will you graft the cutting?
  • Preparing the donor Plumeria tree for taking cuttings
    • Selecting a healthy tree with no visible signs of stress is important, the healthier the donor tree, the better survival chances your cutting will have.
    • Watering the donor tree the night before will provide extra hydration to the cutting.
    • Remove the leaves by cutting the leaf stem about 1/2″ from the branch before or right after you take the cutting. Leaves left on cuttings will cause the loss of valuable moisture. Breaking the leaves off can damage the cutting and allow disease to enter at the damaged leaf nodes.
    • If taking the cutting for rooting remove any inflorescence, they could prevent the cutting from rooting. 
  • Take cuttings from plumeria using clean tools. You can use garden shears, a sharp knife or saw with fine teeth.
    • Clean your cutting tools between taking cuttings from each tree or even more often.
    • Do not cut bad branches off when taking cuttings.
    • Select a branch from the last growing season that is light gray for best results.
    • For rooting, cuttings should be 12″ or longer. Larger cuttings have a better chance of rooting, but I’ve noticed that very large branches take longer to root.
    • For grafting, cuttings should be 8″ to 12″ long. Large cuttings are more difficult to handle and slip more easily. Finding the right root stock can be a problem for large diameter cuttings. 
  • Right after you make the cuttings.
    • For rooting, dip in a rooting hormone, the longer you wait the less benefit it will have.
    • For grafting no need to dip in a rooting hormone.
  • Allow the cuttings to Callus. Roots will not form until the cutting has formed callus.
    • Place in a warm dry place out of direct sun.
    • Allow plenty of air circulation.
    • Check the cut ends often to be sure they are not getting soft. If you find any getting soft, you should cut until you see good white wood.
    • Allow the cuttings to dry until the cut end is hard, usually from 1 week in warm climates to 2 weeks or longer in cooler climates.
    • Cuttings can be stored for weeks or even months, depending on the cultivar. The sooner they are planted after properly callused, the better they will do.
  • Potting soil mix preparation
    • Use a mixture of 1 parts Perlite to 1 part potting mix without fertilizer. The key is to have a well draining mix.
    • Moisten the potting mixture until it holds together but is not dripping water.
  • Fill a rooting tube or 1 gal pot (larger if needed for big cuttings) with lots of drain holes with the potting mix. 
    • Use one pot for each cutting
    • Or one rooting tube for each cutting
    • If using rooting tubes, place a cotton ball in the bottom so you will not lose soil.
    • You can use a large pot and place several in 1 pot. This is called gang rooting. It works well, but can cause damage to the roots when transplanting.
  • Make a hole 3″ to 5” deep deep and a little bigger than the diameter of your cuttings in the center of each pot.
    • Use your finger or the handle of a trowel.
    • Insert the cutting in the hole.
    • Gently firm the soil around the cutting.
    • It is a good idea to use bamboo stakes to keep the cutting from moving. The slightest movement for wind or animals could break the newly formed roots.
  • Watering you newly planted cutting
    • Water the pot or rooting tube well ONCE with a mix of Vitazyme and Carl Pool’s Root Activator and do not water again until you see 3 or 4 full leaves.
    • Add more soil if needed.
    • Check the cuttings every week.
    • If the cutting seems to get dehydrated or shows wrinkles, then you should lightly mist every day until the wrinkles are gone or at least minimized (NOT WATER)
    • Watering a rooting cutting to much will cause rot.
  • Place your potted cutting in a warm location and move to full sun after a week or so of exposing it to more sun each day.
  • When your cutting has 3 to 4 full sized leaves your cutting typically will have roots. The more the leaves the more roots.
    • Depending on your location and weather, cutting will form good roots in about 45 days.
    • The reds are usually harder to root.
  • Fertilizing by misting the new leaves is a good idea. Use 1/2 strength for first time and spray early or late in the day, but not in full sun.
  • Transplanting
    • Your cutting can stay in a 1 gal pot for many months. You can transplant to a larger pot when you see roots coming out of the pot.
    • If in a Rooting tube, you should transplant when you see 4-6 leaves to a pot.
    • Or you can transplant into the ground if you are in an area free of frost or freezes.

Tips

  • Cuttings should generally consist of the current or past season’s growth. Avoid taking green cuttings, they are harder to root and avoid material with flower buds if possible. Remove any flowers and flower buds when preparing cuttings so the cutting’s energy can be used in producing new roots rather than flowers. Take cuttings from healthy, disease-free plants, preferably from the upper part of the plant. Select cuttings from a healthy plumeria.
  • If your cutting looks wrinkled, soak overnight in warm water. Add a little SuperThrive (follow mix instructions) or Hydrogen Peroxide (use 1/2 cup to 1 gal).
  • If you cutting starts to get soft and turns black on the cut end, you should cut until you see all white.
  • If your cutting is already hard on the cut end, you do not need to recut. 
  • DO NOT use a bloom booster fertilizer (high center number), you want the cutting’s energy going towards creating roots, not to producing blooms.
  • Newly rooted cuttings should not be transplanted directly into the landscape. Instead, transplant them into containers. Growing them to a larger size before transplanting to a permanent location will increase the chances for survival.
  • Rooting time varies with the type of cutting (tip or mid cutting), the cultivar being rooted, and environmental conditions. Reds typically require more time than white or yellow plants. Early Spring to Mid Summer is a good time to root plumeria. Once rooted, they will have three or four normal sized leaves and may be transferred to a larger pot and fertilized. Winter is not a good time due to plumeria going dormant.
  • The rooting medium should be sterile, low in fertility, and well-drained to provide sufficient aeration. It should also retain enough moisture so that watering does not have to be done too frequently. Materials commonly used is a mixture of one part peat and one part perlite (by volume). Vermiculite by itself is not recommended, because it compacts and tends to hold too much moisture. Media should be watered while being used.
  • Place the cutting out of direct sun in a dry location. Allow the cut end of the cutting to dry until it is dry and firm. This takes 5 to 15 days depending on the weather. If the cut end becomes soft or rot starts, you will need to cut until all the dark coloration is gone. You can dip in a rooting hormone after a new cut is made. Before planting be sure the cutting is firm and looks healthy. If the cutting looks dehydrated or wrinkled you can soak for 4-6 hours in water. A bit of SuperThrive can be beneficial.
  • Treating cuttings with root-promoting compounds, (while the latex is still wet) can be a valuable tool in stimulating rooting of some plumeria that might otherwise be difficult to root. Prevent possible contamination of the entire supply of rooting hormone by putting some in a separate container before treating cuttings. Any material that remains after treatment should be discarded and not returned to the original container. Be sure to tap the cuttings to remove excess hormone when using a powder formulation.
  • While terminal parts of the stem are best, a long shoot can be divided into several cuttings. Depending on the Cultivar cuttings will generally range from 10 to 18 inches long. Use a sharp, thin-bladed pocket knife or sharp pruning shears. If necessary, dip the cutting tool in rubbing alcohol or a mixture of 1 part bleach to 9 parts water to prevent transmitting diseases from infected plant parts to healthy ones. 

Supplies You’ll Need

  • Clean and sharp shears or knife
  • Isopropyl Alcohol, for cleaning tools
  • Hydrogen Peroxide, Why Hydrogen Peroxide or SuperThrive
  • 1 gal or 2 gal nursery pots or Rooting Tubes
  • Rooting Hormone powder. I suggest Hormodin 2 Rooting Compound for wood and semi-woody plants
  • Potting soil
  • Coarse Perlite
  • Bamboo stakes
  • Vitazyme, Why Vitazyme?
  • Carl Pool’s Root Activator, Why Carl Pool’s Root Activator?
  • A good balanced slow release fertilizer to feed the roots. I suggest Excalibur 11-11-13, Why Excalibur 11-11-13?
  • A good balanced fertilizer for Foliar feeding. I suggest BioBlast 7-7-7, Why Bioblast 7-7-7?

Rooting Plumeria cuttings in water

Although people have been rooting plumeria in water with some success, this is not the best way to root your plumeria. The roots that form in water are not the same as roots that form in soil. They are fragile and brittle, adapted to growing in water as opposed to soil. Once you transfer a water-rooted plant to soil, many of these roots will break off immediately and the rest will shrivel and die up as they’re replaced by the more robust roots adapted to soil.

If you do water root, Just remember once a plant is in water, it will develop “water roots” and feed itself with water nutrients. When you put it in soil, (after all that is where they grow naturally) the first week, keep it in a cup, so the soil is really wet, puddle like, then gradually as the weeks go by, decrease the water and just let the soil be moist.

That way, it eventually will send out new soil roots, and can feed itself accordingly.

A Guide to Grow Plumeria from Cuttings

How to Root Plumeria Cuttings

How to Root Plumeria Cuttings

Propagation by cuttings is the most commonly used method to propagate plumeria. Normally plumeria cuttings are quite easy to root if done in the Spring and Summer. All plumeria cutting will root under perfect conditions, some take longer than others. Do your research so you are aware of the hard to root cultivars. Some hybrid plumeria can be more difficult to root. 

The biggest mistakes made are over-watering and trying to root late in the growing season. For difficult to root plumeria cuttings you can use a grow or heat mat placed under the pots to encourage new root growth. Plumeria roots grow best when the root zone temperature is between 75 and 85 degrees.

Procedures for Rooting Plumeria Cuttings

Rooting cuttings in the soil is the best way to get strong roots

  1. Cuttings should generally consist of the current or past season’s growth. Avoid taking green cuttings, they are harder to root and avoid material with flower buds if possible. Remove any flowers and flower buds when preparing cuttings so the cutting’s energy can be used in producing new roots rather than flowers. Take cuttings from healthy, disease-free plants, preferably from the upper part of the plant. Select cuttings from a healthy plumeria.
  1. The fertility status of the parent plant can influence rooting. Avoid taking cuttings from plants that show symptoms of mineral nutrient deficiency. Conversely, plants that have been fertilized heavily, particularly with nitrogen, may not root well. The stock plant should not be under moisture stress. Cuttings from lateral shoots often root better than cuttings from terminal shoots.
  2. Early morning is the best time to take cuttings because the plant is fully turgid. It is important to keep the cuttings cool and moist until they are planted.
  3. While terminal parts of the stem are best, a long shoot can be divided into several cuttings. Depending on the Cultivar cuttings will generally range from 10 to 18 inches long. Use a sharp, thin-bladed pocket knife or sharp pruning shears. If necessary, dip the cutting tool in rubbing alcohol or a mixture of 1 part bleach to 9 parts water to prevent transmitting diseases from infected plant parts to healthy ones. 
  4. Remove the leaves by cutting the leaf stem about 1/2″ from the branch before or right after you take the cutting. Leaves left on cuttings will cause the loss of valuable moisture. Breaking the leaves off can damage the cutting and allow the disease to enter the damaged leaf nodes.
  5. Treating cuttings with root-promoting compounds, (while the latex is still wet) can be a valuable tool in stimulating the rooting of some plumeria that might otherwise be difficult to root. Prevent possible contamination of the entire supply of rooting hormone by putting some in a separate container before treating cuttings. Any material that remains after treatment should be discarded and not returned to the original container. Be sure to tap the cuttings to remove excess hormone when using a powder formulation.
  6. Place the cutting out of the direct sun in a dry location. Allow the cut end of the cutting to dry until it is dry and firm. This takes 5 to 15 days depending on the weather. If the cut end becomes soft or rot starts, you will need to cut until all the dark coloration is gone. You can dip in a rooting hormone after a new cut is made. Before planting be sure the cutting is firm and looks healthy. If the cutting looks dehydrated or wrinkled you can soak for 4-6 hours in water. A bit of superthrive can be beneficial.
  7. The rooting medium should be sterile, low in fertility, and well-drained to provide sufficient aeration. It should also retain enough moisture so that watering does not have to be done too frequently. Materials commonly used is a mixture of one part peat and one part perlite (by volume). Vermiculite by itself is not recommended, because it compacts and tends to hold too much moisture. Media should be watered while being used.
  8. Insert the cuttings one-third their length or at least 3″ into the medium. Maintain the vertical orientation of the cutting (do not insert the cuttings upside down). Make sure the buds are pointed up. Space cuttings are just far enough apart to allow all leaves to receive sunlight. Water well after inserting the cuttings and lightly tamp the mix around the stem of the cutting to provide support. If needed you can brace the cutting with stakes make out of bamboo. The less movement the better. Avoid the direct sun until you see signs of leaves. After the first watering keep the medium dry until the cutting has rooted. If the cutting appears to be dried out or wrinkled, a light misting on a regular basis to keep the cutting hydrated.
  9. Rooting time varies with the type of cutting (tip or mid-cutting), the cultivar being rooted, and environmental conditions. Reds typically require more time than white or yellow plants. Early Spring to Mid Summer is a good time to root plumeria. Once rooted, they will have three or four normal size leaves and may be transferred to a larger pot and fertilized. Winter is not a good time due to plumeria going dormant.
  10. Newly rooted cuttings should not be transplanted directly into the landscape. Instead, transplant them into containers. Growing them to a larger size before transplanting to a permanent location will increase the chances of survival.

Rooting Plumeria cuttings in water

Although people have been rooting plumeria in water with some success, this is not the best way to root your plumeria. The roots that form in water are not the same as roots that form in the soil. They are fragile and brittle, adapted to growing in water as opposed to soil. Once you transfer a water-rooted plant to the soil, many of these roots will break off immediately and the rest will shrivel and die up as they’re replaced by the more robust roots adapted to the soil.

If you do water root, Just remember once a plant is in water, it will develop “water roots” and feed itself with water nutrients. When you put it in soil, after all, that is where they grow naturally, the first week, keep it in a cup, so the soil is really wet, puddle-like, then gradually as the weeks go by, decrease the water and just let the soil be moist.

That way, it eventually will send out new soil roots and can feed itself accordingly.

Guide to Coco Coir Growing Media

When picking out the right growing media for Plumeria there are several things to consider.  After reading the labels, you actually became more confused than before.

The scoop on growing media. First off, it needs to be stated that technically all of the “potting soils” sold in grow shops and gardens centers are actually soilless mixes because they do not contain any of the natural soil components including: sand, silt or clay. Choosing your media, watering and fertilizing habits are key to successful plumeria growing.

Soilless Growing Media

Soilless growing is great and has easily become the method of choice for plumeria growers because of its superior properties, and ease of amending. Soilless media allows for the ultimate control over desired inputs, drainage properties, pH and nutrient control. The most common soilless potting mixes are made with one of two bases.

The most common base is Coco Coir. This media is 100% natural and made from coconut husk fibers. It is generally a finely ground blend with some desired variation. It has the perfect air to water ratio, and thus is hard to over water. Coco coir also has a high CEC encouraging optimal nutrient release. Due to its superior qualities Coco coir allows for rapid growth. Keep in mind that with Coco coir bases, Calcium -Magnesium supplementation may be needed.

If it is not a coco coir base, it is generally a peat based mix. Peat is partially decayed and dried sphagnum moss. It is extremely high in organic matter, and retains moisture better than coco coir. Thus, it is not as forgiving if you over water. By itself, peat usually has a very low pH, between 3 and 5. In potting mixes you can help balance the acidity with the addition of lime. For a peat based potting mix our go to of choice is Pro-Mix.

Amendments

Once you’ve decided which base is best for your growing conditions, next you have the soilless amendments. Amendments help define the final properties of the mix, which is customized for health growth results. Common amendments include the following, and added for the following reasons.

  • Perlite: increases drainage and aeration
  • Dolomite lime: buffers pH, provides calcium and magnesium
  • Worm castings: natural source of nitrogen, enhances beneficial microbe population
  • Mycorrhizae: symbiotic growth on and around roots, increases water and nutrient uptake
  • Azomite: buffers pH, slow release of micronutrients
  • Oyster shell: buffers pH, provides calcium
  • Dried kelp: source of potassium and natural plant hormones
  • Alfalfa meal: organic source of balanced fertilizer, amino acids and triacontanol
  • Feather meal: source of organic slow release nitrogen
  • Fishbone meal: organic source of phosphorus and calcium

Typical Ground or Garden Soil

Soil is used almost exclusively in outdoor growing. Its composition varies from place to place and consists of countless natural and native components. These components include mineral particles- sand, silt, and clay (45% collectively), air (20-30%), water (20-30%), organic matter (1-6%), microorganisms and the ever pervasive weed seed.  Organic (carbonaceous) matter, often referred to as humus, is composed of decaying plant and animal remains. Microorganisms include both beneficial and harmful bacteria and fungi. Weed seeds are one of the grower’s greatest foes. Not only are they a nuisance, but they also compete with your crop for water and nutrients.

Since the composition changes from area to area, the properties change along with it. Soil with a healthy ratio of soil particles and organic matter will have good drainage. If the soil is compacted with low aeration, roots and plant growth will struggle. Conversely, if there is too much drainage, growth will also be hindered due to a lack of water and nutrient retention.

Along with your soil composition changing from area to area with soil, so will your soil fertility. The most important aspects of soil fertility to keep in mind include the presence and amount of organic matter, macro and micro nutrients, pH and CEC. There are various amendments and fertilizers that can help you achieve desired results in an outdoor setting.

Articles

Articles

[vc_row][vc_column][wikilogy_content_list order-type=”newest” style=”style-3″ column=”3″ image=”true” excerpt=”true” author=”true” category_status=”true” date=”true” read-more=”true” pagination=”true” count=”12″][/vc_column][/vc_row]

Blog – Home

[vc_row][vc_column][wikilogy_blog_list style=”style-1″ column=”1″ image=”true” excerpt=”true” author=”true” category_status=”true” date=”true” read-more=”true” pagination=”true” count=”10″][/vc_column][/vc_row]

Water Rooting vs Soil Rooting Plumeria

Rooting Cutting, is there a right way?

Is rooting in water the best way for Plumeria?

Although people have been rooting plumeria in water with some success, this is not the best way to root your plumeria. The roots that form in water are not the same as roots that form in the soil. They are fragile and brittle, adapted to growing in water as opposed to soil. Once you transfer a water-rooted plant to the soil, many of these roots will break off immediately and the rest will shrivel and die up as they’re replaced by the more robust roots adapted to the soil.

If you do water root, Just remember once a plant is in water, it will develop “water roots” and feed itself with water nutrients. When you put it in soil, after all that is where they grow naturally, the first week, keep it in a cup, so the soil is really wet, puddle like, then gradually as the weeks go by, decrease the water and just let the soil be moist.

That way, it eventually will resend out new dirt roots, and can feed itself accordingly.

Is rooting in the soil the best way for Plumeria?

Rooting in the soil is the best way to get strong roots,

To get the best results, follow these simple steps:

  • Use healthy cuttings, preferably from newer growth. Take the cutting with a sharp knife or cutters. Although it depends on the cultivar, most cuttings should range from ten to fifteen inches.
  • Trim the cutting of all leaves. Leaves will cause the cutting to lose valuable moisture. If you’re using a rooting hormone apply immediately after taking the cutting.
  • Plant the cutting in your potting medium. Lightly tamp the mix around the stem of the cutting to provide support.
  • Water the soil well and place it in a warm dry area. Most plumeria cuttings do well in full sun while they root. Cuttings thrive on warmth and humidity, but the potting soil should drain well and kept dry after the first watering. A good rooting mix is 1 part potting soil mix with 1 part perlite. Misting the cutting is ok if you see signs of wrinkling.

When you see 3-4 new leaves and the new plant is established with healthy root growth. Transfer it to a new pot with fresh well-draining potting soil.

And that’s it! You can root most cultivars from cuttings, but if you find that you’re having a hard time with any particular cultivar, make sure you’re not overwatering.  For difficult to root plumeria cuttings, try a plant grow mat placed under the pots to encourage new root growth or try grafting.

Plumeria roots grow best when the root zone temperature is between 75 and 95 degrees.

Growing Plumeria Indoors

Growing Plumeria Indoors
with All the Colors of the Rainbow

Growing plumeria indoors is not the best idea, you need to provide special lighting, watering, and misting, and you will not get as good growth or flower colors or production as outdoors. Mabe this article will help you learn about lighting and how important it is.

The impact that light has on the human eye is different than the effect it has on your plants. Plumeria takes in light to use in the photosynthesis process to convert energy into sugars to consume as food. Different colors of the light spectrum have varying impacts on the quality of your plants, the rate at which they grow, and when they fruit or flower. We had the chance to pick the brain of  John G from Sunlight Supply, that was nice enough to share his knowledge and expertise. Come ride the colors of the rainbow with us and learn more about how light spectrums and light exposure affect your plumeria.

Eye Spy With My Little Eye

To better understand what you are offering your plumeria when flipping that light switch, let’s break down some industry info. The light spectrum is measured in nanometers (Nm)- that’s one billionth of a meter. Typically, when evaluating the light spectrum you look at the realm of 380 Nm to 780 Nm. We call this the lumen scale.

Well, you only “see” the scale of 400-700 nm with the human eye. That’s why in the industry we tend to say that “lumens are for humans.”

Somewhere Over the Rainbow

The 400-700 nm scale is what we know as primary (red, blue, and yellow) and secondary colors (orange, green, indigo, and violet). Plumeria has the ability to see further into the ultraviolet (<390 nm)  and infrared (700+ nm)- the furthest ends of either side of the light spectrum. However, plumeria does not benefit from these extreme ends of the spectrum.

Plumeria experience infrared and ultraviolet in the same capacity that humans do. Infrared is perceived as warmth (1) and does not aid in any vitamin or chemical processes and ultraviolet (UV) rays will prohibit growth and can actually burn and kill the plant, much like overexposure can burn skin.

Mimicking the Great Outdoors

It is a true artist of a grower that can truly mimic the sun. When growing indoors, you are constantly attempting to recreate environmental factors within an enclosed space. From your ventilation system to your lighting, you are trying to mimic both the wind and the sun to trick your plants into believing they are in their natural habitat. Part of mimicking the free offerings of nature is attempting to recreate the seasons for your plants so they know when to flower and/or fruit.

Plumeria responds to the different colors of light due to their ability to trigger different stages of the growth cycle.  

Plumeria’s photoreceptors and hormones are affected when exposed to certain spectrums in different intensities. The segment of the light spectrum that plumeria is responsive to is called the photosynthetic active radiation (PAR). PAR accounts for the 400-700 nanometer wavelengths that plants see and utilize for growth and development. When playing with the spectrum that you apply to your plumerias, it allows you to forgo the use of plant growth regulators that can have potential weird side effects on your plumeria. By discovering the desired balance of spectrum and an ideal number of “daylight” hours your plumeria prefers, you can manage growth naturally (the preferred growing method).

Green Doesn’t Mean Grow

Your plumeria appears green because it is the color of light they do not absorb and actually reflect. Plants have no use for the color green on the light spectrum and as a result, is the color we perceive with our eyes when looking at them. Plants also appear green due to the chloroplasts in the leaves of your plants that produce chlorophyll and are the energy production system of the plumeria.

Red Light District

Plants have a photoreceptor that is blue-green in color and called a phytochrome. The sole job of phytochrome is to absorb red light. The absorption of red light will increase your plumeria’s production of a hormone called metropolis.  This hormone prevents the degradation of chlorophyll in the foliage of your plumeria and is what allows a plant to stay green during the spring and summer months. The more chlorophyll that your plants have, the higher ability they have to process more energy and promote their own growth. Red light also helps your plants to determine when to flower and affects seed formation.

The secondary colors on the red side of the spectrum (yellow and orange) have a similar, but less intense, effect as a red light would.

Due to the effect that red light has on triggering the flowering phase of your plumeria you should avoid exposing your plants to red light during their dark period.  This means not opening the door to your grow space for any reason during their dormant hours or having any other lights within your grow space that may affect them (i.e. power cord power buttons, automated controller LED lights). We recommend covering any lights with black electrical tape to minimize exposure to unintentional light sources.  It may seem melodramatic but, just like your emo best friend, your plumeria is sensitive little souls. The exposure can extend the vertical growth period and put off the flowering phase. 

Blue Hue

Just as with the exposure to red light, plants also have a photoreceptor that uses blue, indigo, and ultraviolet light. The blue photoreceptor is called a cryptochrome. In the presence of elevated blue light, which is typically emitted more by the sun in the fall season, a plant will slow its vertical growth. This is due to the fact that blue light slows down the production of the hormone called auxin. Auxin is responsible for both root development and vertical growth. When the production of this hormone slows, plants begin to branch out laterally, growing more bushier as opposed to taller.

Plumeria also uses blue light to determine how much or how little to open their stoma (the pores of the plant responsible for taking in CO2 and emitting water and oxygen). The plumeria reads the amount of blue light present and will use this information to either increase growth or to slow development and go into the flowering phase.

The far side of the blue spectrum enters into the ultraviolet territory and can be both beneficial and harmful for your plumeria. Just like the UV effect on your skin, it can cause DNA and membrane damage. However, UV can also increase the production of anthocyanin, which can give your plumeria a purple hue but also help your plants naturally defend themselves against lethal microorganisms. It is a delicate balance. 

Light My Way

There are many different light methods that have been used in the growing industry. More recently, the norm has shifted towards the use of mixed spectrum lights that are composed of both red and blue spectrums, created to mimic the sun. Daylight as we call it is full spectrum.  The only downfall to daylight is that in some cases its can be too much light. You will notice that many times at the brightest time of the day plumeria will drop their leaves and basically shut down photosynthesis. You can see this in garden centers when the plant description tells you how much exposure the plant really likes.

This balance is best set at a 5:1 red to blue light ratio but there are many growers that still use plant or light transfer methods. By this we mean, either changing out your bulbs from a primarily red to blue light when ready to move into the flowering stage in smaller operations. For larger operations, it may be easier to move your plumeria into a “finishing room” with a higher blue spectrum lighting.

You can create your own custom light spectrums by being intentional when combining and choosing your grow lights. When customizing your lighting spectrum, we are big fans of Hortilux bulbs. You can select lights, such as the Hortilux family, to fill your four lamps or eight lamp fixture to create a blue specific formula to use during your veg cycle. You can also select from their FLOWER line to let your flowering/fruiting plants reap the rewards. If you are looking to create a mixed spectrum fixture, you can combine lamps that will help to stimulate an outdoor growing environment and allow you to avoid any exchange or further thoughts to your grow lights than routine maintenance. 

The More You Know, The Better You Grow!

Step Into the Light

Your lighting system is an art form to perfect as an indoor gardener. Developing a system for your plumeria that gets you the most return on investment takes time and experimentation. To help get you there a bit faster there are a few pro-tips that can help you develop your lighting system:

  • Give your plants a 24-36 hour darkness treatment to speed up your plant’s transition into bloom
  • Stick to a rigid 12-12 lighting schedule with no interruptions once your plants have entered their flowering cycle
  • Use a light timer to keep your plants on a consistent light schedule and know that schedule so you don’t disturb them when they are sleeping
  • Even brief flashes of light exposure during your plants’ dormant hours can cause damage to your plant’s cycle and can take upwards of a month to readjust

Lighting is an essential element to creating a quality growing environment. By staying informed with our fresh industry information, the more you will come to know how to improve your grow area! Keep your eyes peeled for more information about how to choose the right lighting for your growth and how to use it on our blog page.