A Guide to Growing Plumeria From Seed

A Guide for Growing Plumeria From Seed by Tex Norwood

This guide shares the basic methods I use for growing plumeria from seed, caring for seedlings, and the products I use. I hope this guide helps you with your seed goals for the year.

There are many proven methods to growing plumeria from seed and you should examine to see if any could help you develop a method that works for you. This is only a guide and should be adjusted to your seed growing environment.

When I have a batch of seeds, I examine what I did in the past and determine if I can make any improvement. The following is my detailed plan for growing plumeria from seed in 2018. This plan covers from germination until they first produce blooms.

Please keep in mind your growing environment and the differences from South Florida Zone 10B. The start of your plan should correspond to when you are past the threat of a frost or freeze. You should also make plans to protect your plumeria from cold weather, just in case you have a late freeze or frost. 

My goal is to know what, when, and why, so I can improve my method every year or even with each batch. Documenting all adjustments as you go will allow you to look back and better determine where you can make improvements.

Why do I grow seedlings?
          1. To grow new and exciting cultivars
          2. To grow rootstock for grafting
          3. But most of all to see that one-of-a-kind flower for the first time.

Using the methods and products below; I have been able to get about 10% of my seedlings to bloom in less than 12 months and about 60% to bloom in 18 to 24 months. The majority of the remainder bloom from 24 to 36 months. (Some do still take 3 years and even longer.)

What you will need: Plumeria Seeds, something to soak them in, paper towels, 2” x 3” Gro-Tech FlexiPlugs and trays or plugs or good seedling soil mix to plant the seeds in, Vitazyme, Carl Pool’s Root Activator, Bioblast 7-7-7, Pro-Mix BX Mycorrhizae, Excalibur VI 11-11-13, Labels and permanent felt tip marker. Hydrogen Peroxide is good to use for mold or fungus.

Seed selection

Seed selection is very important when growing plumeria seeds. Plumeria Rubra seeds do not produce true to their parents. Sometimes a seedling will look like its parent, but it will never be exactly the same.  A few characteristics to consider:

  • Flower: Color, size, keeping quality (how long it lasts after picking), fragrance, etc.
  • Tree: Growing habit, size, etc.
  • Leaves: Color, size, etc.
  • Blooming: Quality, size of inflorescence/flower stalk, number of flowers blooming at the same time, how long does it bloom, etc.

I’m always trying to improve my chances of getting that spectacular plumeria seedling.

If possible:

  • Select a pod parent that is known to produce the characteristics you desire or at least a pod parent that has the characteristics you desire.
  • Obtain seeds from trusted growers.
  • Find out the history of the pod, e.g., What’s growing close to the pod? Did they bloom at the same time? Was it cross-pollinated, manually pollinated, or pollinated by nature?
  • Obtain all the seeds from a pod when possible.
  • Select seeds from a healthy tree.
  • Select seeds that are plump and look healthy.

Before you plant your seeds

Soak plumeria seeds to test the viability and soften the shell to give them a kick start.

When: Plumeria seeds germinate best in the spring, but can be germinated any time if provided with enough moisture and warmth staying above 60 degrees.

What: Use quality seeds, warm water, and Vitazyme

How: 

  1. First, examine each seed by placing it between two fingers. If they have some thickness, they most likely are viable. If they feel paper-thin, they most likely are not viable.
  2. For faster germination and rooting, dilute Vitazyme with warm water at a rate of 1 oz to 19 oz of water, a 5% solution, and dip or mist both sides of the seed. Allow seeds to dry prior to planting or soaking.
  3. For a soaking mixture, dilute Vitazyme with warm water at a rate of about 1.29% or 1 oz to 128 oz (1 gallon).
  4. Place your seeds in the container, place in a warm area, and allow to soak for approximately 4-6 hours (or even overnight). Soaking longer than overnight could cause damage to the seeds. Seeds that are very thin and are still floating are most likely not viable. To further test this, plant all the seeds, but mark the ones that did not sink.
  5. Check your seeds after several hours to see which seeds are absorbing enough liquid to allow germination and to sink to the bottom.
  6. Do not allow your seeds to dry out before you plant them.
  7. Now your seeds are ready to plant.

Why: 

  1. To soften the seed’s protective coating
  2. To allow the seed to absorb as much water as possible
  3. To test the viability of the seed
  4. To provide nutrients as early as possible, helping germination and starting the rooting process sooner

Preparing Plugs

When: Prior to planting seeds in plugs.

What: 2”x3” Grow-Tech peat plugs, warm water, Root Activator, and Vitazyme.

What we suggest: A mixture of warm water, Vitazyme, and Carl Pool’s Root Activator.

How: Soak your plugs in a mixture of 1 gal of warm water, 2 oz Root Activator, and 1 oz Vitazyme for about 2 hours.

Why: Vitazyme is a bio stimulate with vitamins that help the overall health of the seeds and the Root Activator adheres to the plugs or soil and gives the roots a kick-start. I use the plugs because they hold the right amount of moisture and provide ample aeration that allows the new roots to breathe.

Watering: Keep your plugs wet or leave them soaking until you are ready to plant the seeds.

Planting your seeds

When: Plant your seeds right after soaking into the prepared plugs. DO NOT allow either to dry out. If they dry out they could be damaged.

Plugs, Pots, or Trays, After Soaking, For the seeds, I grow for new cultivars, I prefer planting the seeds directly into 2″ x 3″ Grow-Tech FlexiPlugs, a foam peat plug. For the seeds, I’m growing for rootstock in flat trays or 4″ pots.

What: Carefully selected plumeria seeds, 2”x3” Grow-Tech FlexiPlugs. Warm water, Root activator, and Vitazyme. You will also need a 36-hole tray and a flat for the plugs. A cover is optional.

Why: The reason I use the plugs is they hold moisture allowing me to keep them soaked with water and still providing ample aeration and allowing the new roots to breathe. I use the 2” x 3” FlexiPlugs that allows me up to 14-21 days before I have to transplant to pots.

Watering – I grow Plumeria seeds in full sun and water 2-3 times a day depending on the weather. My goal is to keep the plugs very moist to the touch. I have had no damping off or rotting problems with this method.

Start Fertilizing – Foliage

When: Before transplanting the plugs into pots, after three or four true leaves have grown. I use the same mix ( see below) approximately every two weeks

What:  BioBlast 7-7-7 NPK fertilizer, Vitazyme

How: Foliar feeding early in the morning or late in the evening with Bioblast at 1 tablespoon per 1 gallon of water and Vitazyme at 1 tablespoon per gallon. Do not spray in the hot sun it will burn the seedling leaves.

Why: Seedlings have seed leaves that provide them with nutrients for the first few weeks of their life, but when the seed leaves dry up and fall off the seedling needs nutrients. Bioblast works with every part of your plant. Soil organisms are invigorated with Vitazyme bio-stimulants providing quicker, more vigorous growth. Roots are encouraged with our Root Activator. A balanced 7-7-7 NPK provides the essentials of plant growth and structure. B-Vitamins and Zinc encourage a robust immune system, while Iron promotes chlorophyll production in the leaves.

Watering – I continue to grow Plumeria the seedlings in full sun and water at least 2-3 times a day depending on the weather. My goal is to keep the plugs moist to the touch. I’ve had no damping off or rotting problems.

Transplanting to Pots and Fertilizing

When: As soon as I see roots sticking out of the plugsPlumeria seedling roots coming out of the Plugs grown from seed, transplant into larger pots. Normally I will use 1 gal pots, but this year I’m using 7.5 gal squat pots. Approximately 14 days after planting in the plugs.

What: ProMix BX Mycorrhizae, Excalibur VI 11-11-14 with micronutrients, Vitazyme, and Root activator.

How: Fill 1 gal. pot with a mixture of ProMix BX Mycorrhizae mixed with 2 tablespoons of Excalibur Vi. Fill a 7 1/2 gal. squat pot with ProMix BX Mycorrhizae or the mix of your choice, dig an area our in the mix about the size of a 1 gal pot, port the contents of the 1 gal pot in the hole, then punch a hole about the size of the FlexiPlug (about 2″x3″) in the center of the filled 7 1/2 gal pot. Place the plug in the hole and press the mix firmly around the plug. Water in well with a mix of Vitazyme 1 oz to 1 gal and Root Activator 2 oz to 1 gal. You may need to add more soil mix if the plug is not covered completely with at least ½” of the mix. Water again the next day and then when the soil is almost dry. I would suggest using a water meter from time to time to verify the moisture content. It is very important the soil does not stay wet.

Why: Promix BX contains Mycorrhizae and is a fast-draining mix. The Excalibur VI, a 6-month granular slow-release fertilizer designed specifically for plumeria that provides all the nutrients a seedling needs to grow strong. Vitazyme a bio-stimulate helps the overall health of the seedlings and the Root Activator adheres to the soil and is there to help the roots develop and grow faster.

Watering – Water once a day for the first two days, then water when the soil is barely moist. At this point, I check with a moisture meter and water when on the low side of moist. It is important not to overwater, keeping the excess soil mix from becoming water-soaked. It is also important not to allow the root zone to become dry.

Fertilizing – Throughout the growing season

When: Apply Excalibur VI every six months, Foliar feed every two weeks to every month with BioBlast.

What: Excalibur VI 11-11-13, BioBlast 7-7-7, Vitazyme and Carl Pool’s Root activator

How: After 6 months, I spread 3 or 4 tablespoons of Excalibur VI on the top of the soil and mix in the top 1-2” of the soil. The seedling should still be in the 7 1/2 gal squat pot. Foliar feed with BioBlast 1 oz to 1 gallon and Vitazyme 1 oz to 1 gal every month or less. Drench with Vitazyme and Root Activator in the Early Spring or if transplanting.

Why: Excalibur provides a balanced slow-release fertilizer specifically designed for plumeria.  BioBlast works with every part of your plant. Soil organisms are invigorated with Vitazyme bio-stimulants providing quicker, more vigorous growth. Roots are encouraged with our Root Activator. 

If possible, do not let seedlings go dormant their first winter. You can treat seedlings as adult plumeria after the first growing season.

Keep looking for more space, they will grow!

A Guide to Growing Plumeria From Seed

The Plumeria Root System

The Plumeria Root System

The plumeria root system constitutes a major part of the plant body, both in terms of function and bulk. In plumeria, the root system is the subterranean or underground part of the plant body. Roots are branching organs which grow downward into the soil, a manifestation of geotropism. Branching occurs irregularly and not from nodes as in stems.

In contrast to shoot, the plant root has no leaves, nodes, internodes and buds. With rare exception, roots also lack stomata.

Other morphological and anatomical features which are distinct to this plant structure are: 

  1. a hard, protective root cap at the tip of the root; (2) absence of the pith; 
  2. presence of endodermis; and 
  3. presence of pericycle next to the endodermis.

These features are found in the root apex which is divided into three regions:

  1. region of cell division which includes the apical meristem protected by the root cap,
  2. a short region of cell elongation where individual cells elongate and force the root tip to move forward through the soil, and
  3. region of cell differentiation and maturation.

In general, the plumeria root system either consists of a taproot system (with primary root found on seedlings) or fibrous roots (adventitious roots found on cuttings) with attached branch roots and finer rootlets having root hairs close to the tip.

Functions of the Plumeria Roots

Despite being inconspicuous because they are normally hidden underground, the plant root system performs various functions which are essential to growth and development. The extent of underground expansion of this plant structure serves as limitation in the growth of the plant. Thus potted plants usually exhibit slow growth but once the roots leak out from the bottom of the pot and penetrate into the ground, growth rate accelerates.

The functions of the plumeria root system include:

  1. Anchorage and support. The plumeria root system anchors the plant body to the soil and provides physical support. In general, however, taproot system provides more effective anchorage such that they are more resistant to toppling during storms.
  2. Absorption and conduction. The plumeria root system absorbs water, oxygen and nutrients from the soil in mineral solution, mainly through the root hairs. They are capable of absorbing inorganic nutrients in solution even against concentration gradient. From the root, these are moved upward. Plants with a fibrous root system are more efficient in absorption from shallow sources.
  3. Storage. The root serves as storage organ for water and carbohydrates. Fibrous roots generally store less starch than taproots.
  4. Reproduction. Plumeria do not reproduce from their roots.

Leaf Shape

Leaves

Leaves functions

Manufacture food through photosynthesis

This is possible due to the green pigment in them called CHLOROPLAST, Leaves are the chief food producing organ in MOST not all plants, and because they create food via photosynthesis they are typically arranged in convenient ways to allow maximum absorption of sunlight.

Gas (air) exchange, Respiration

Leaves use our bi-product carbon dioxide for photo synthesis! This co dependent relationship is required for survival for not only them but for everything here on earth that requires oxygen to live.

Protect vegetative and floral buds

Some plants are unique in terms of how they’ve adapted to protecting themselves by growing their own defenses. Example: the artichoke has grown a protective wall over the entire bud to allow it to safely grow!

Water transport, transpiration

Plants lose a relatively large amount of water through transpiration through their STOMATA, in fact its estimated that the loss of water via stomata through the process of transpiration exceeds over 90 percent of the water absorbed by the roots!

Leaf Shapes

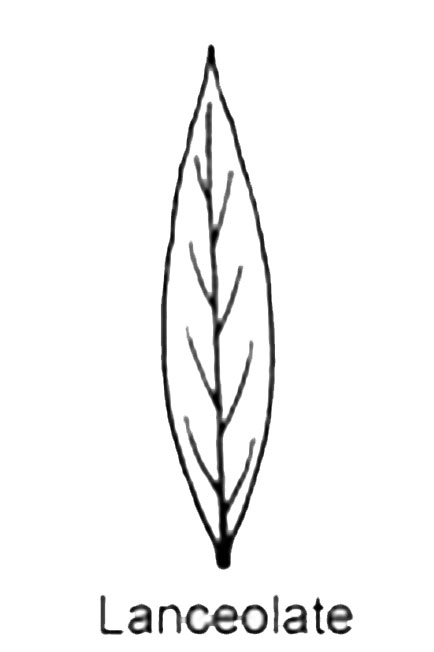
Lanceolate

Lanceolate leaves are significantly longer than wide and widest below the middle, gradually tapering toward the apex. Type 1

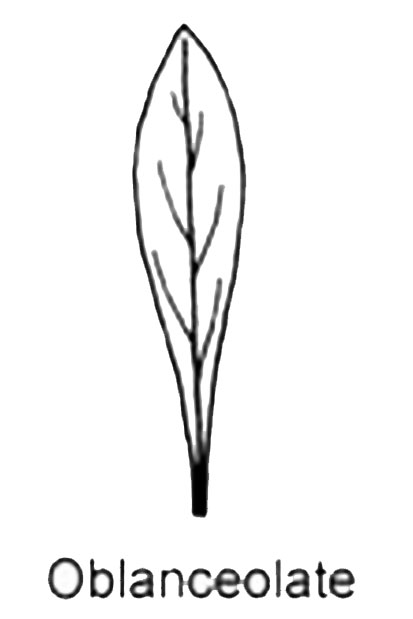
Obanceolate

Obanceolate leaves are significantly longer than wide and widest above the middle, gradually widening toward the apex. Type 2

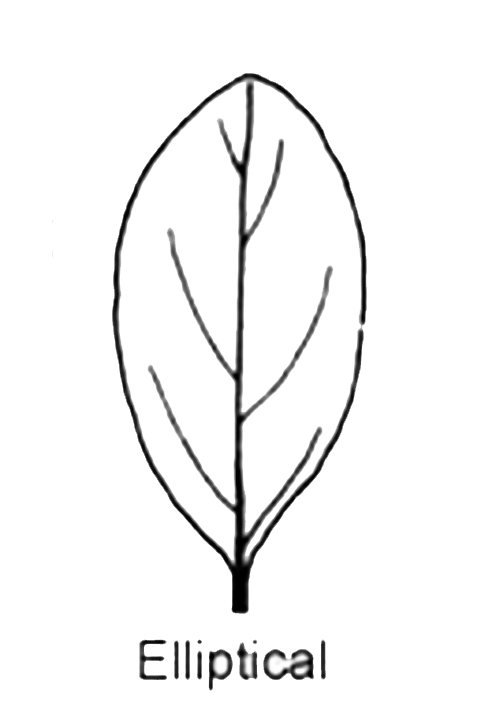
Elliptic

Elliptic leaves are about twice as long as broad. The broadest part is in the middle and the two ends narrow equally. Type 3

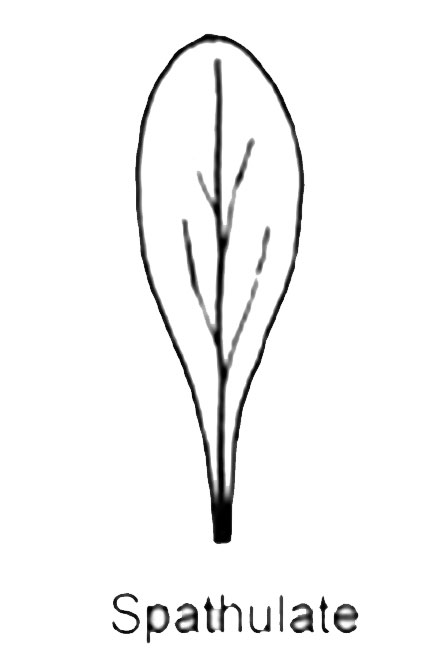
Spatulate

Spatulate leaves are broadly rounded at the apex and gradually curve down toward the base. Type 4

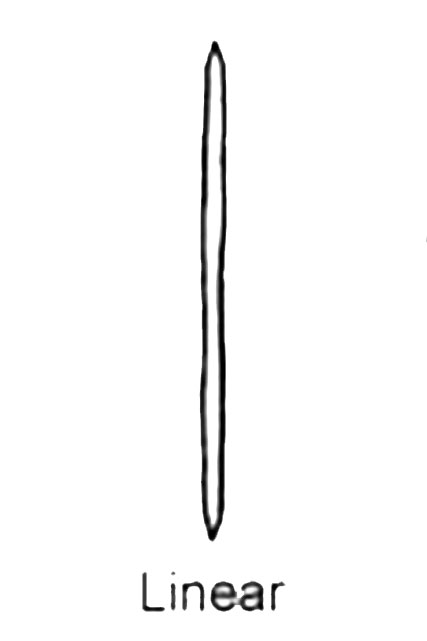
Linear

Linear leaves are more that twelve times longer than wide. They are long and narrow with more or less parallel margins or sides.

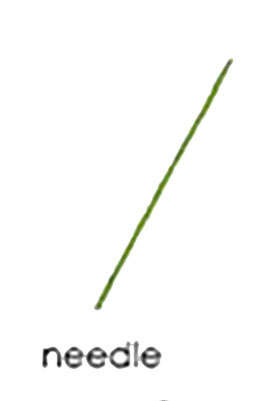
Needlelike

Needlelike leaves are then and long like needles. filifolia is the only Plumeria know to have this type of leaf.

Round

Round leaves are broadly rounded at the apex and the base.

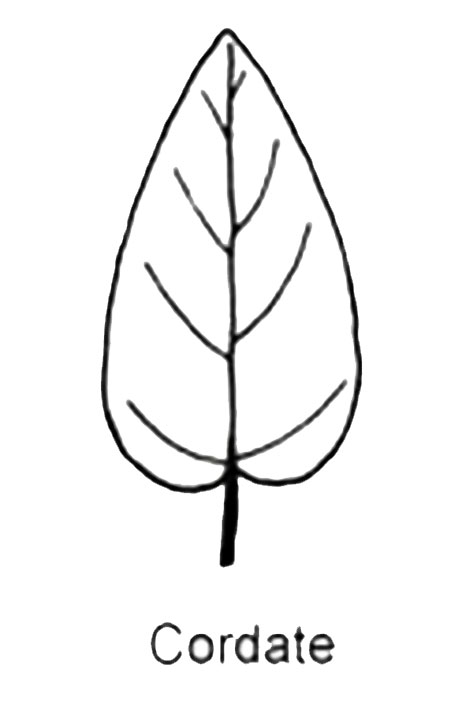
Cordate

Cordate leaves are shaped like hearts. The stem is attached at the wide end of the leaf.

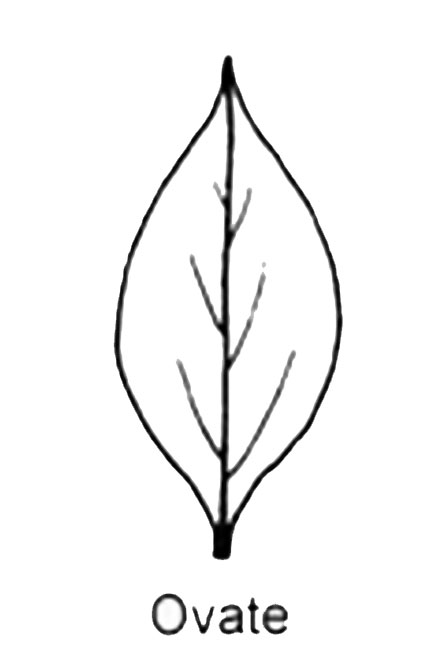
Ovate

Ovate leaves are shaped like an egg, with the broader end of the leaf nearest the petiole.

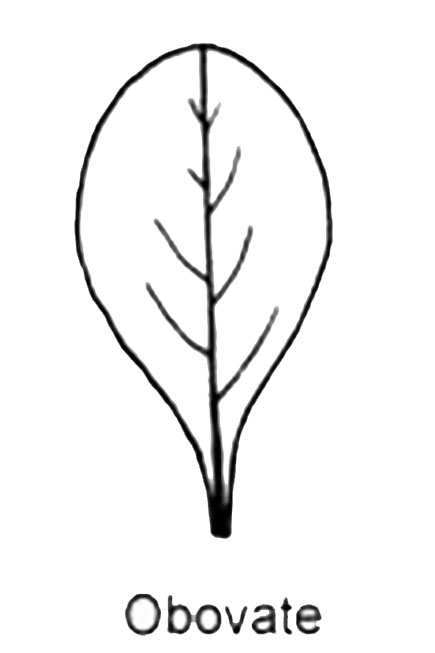
Obovate

Obovate leaves are shaped like an egg, with the broader end of the leaf farthest from the petiole.

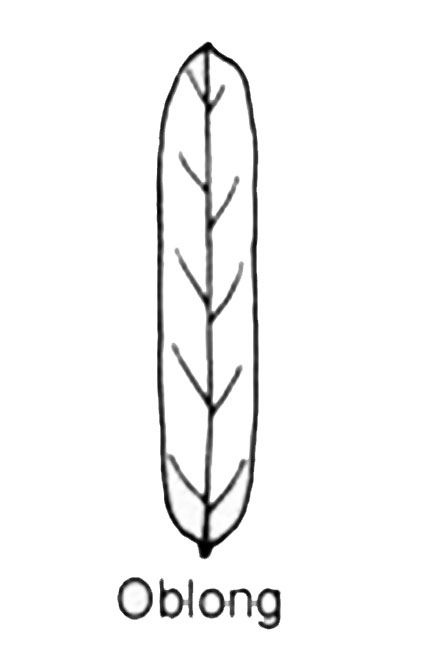
Oblong

Oblong leaves almost resemble a rectangle, except that their corners are rounded. They are at least twice as long as they are wide.

Plumeria Leaf Tip Shapes

Type 1 emerginate

Type 2 obtuse or rounded

Type 3 obtuse or blunt

Type 4 acute

Type 5 acuminate

Leave Structure

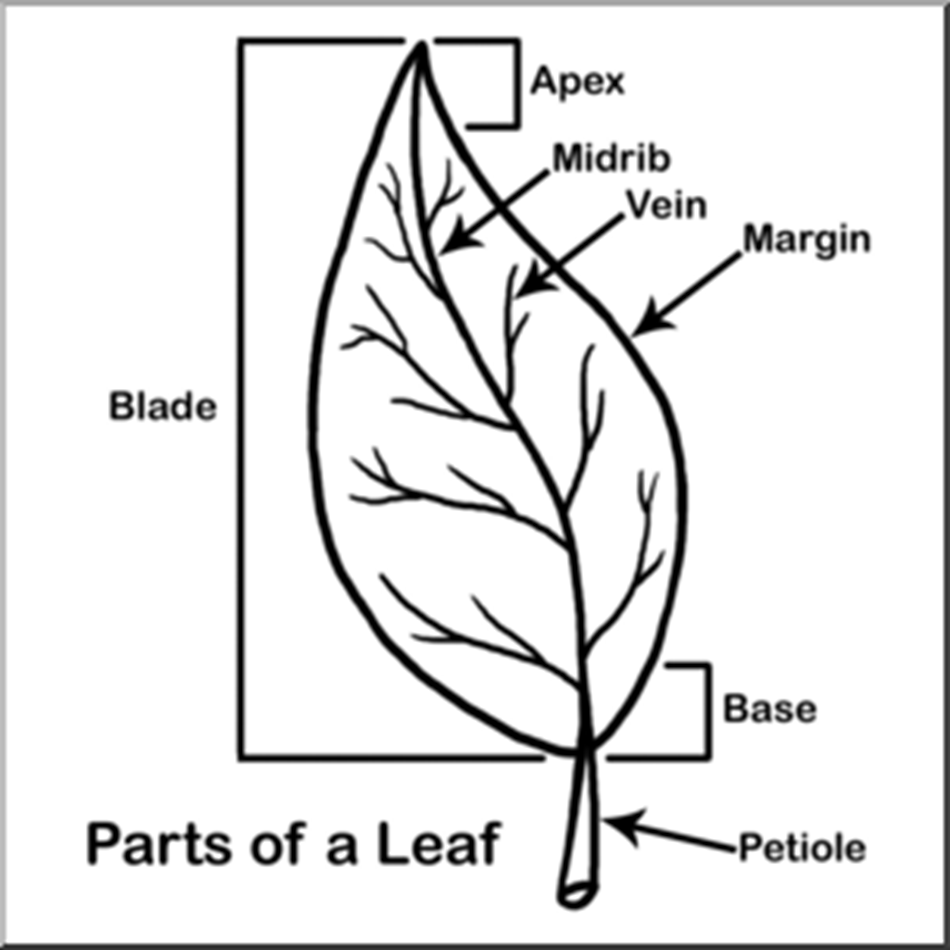
Leaves are organs to the plant, they come in many different shapes, sizes, and arrangements all varying on the different conditions each plant must survive in.

An important part of leaves is the role of STOMATA or STOMA. Stoma consist of a pore surrounded by 2 sausage shaped epidermal guard cells. These pores are open and close as they regulate the flow/amount of gases and water to and from the leaves. 

They are typically found on the underside of leaves but in some cases, they are found on other organs of the plant like the stem or fruit.

Legend of definitions


Chloroplast

A plastid that contains chlorophyll and in which photosynthesis takes place

Stomata

Stoma consist of a pore thats surrounded by 2 sausage shaped epidermal guard cells. These pores open and close as they regulate the flow/amount of gases and water to and from the leaves.
Photosynthesis    The process by which green plants and some other organisms use sunlight to synthesize foods from carbon dioxide and water.

What food do seeds need?

A typical seed has the following parts and the functions.


  1. Radicle = It is embryonic root system.during seed germination it begins to grow and goes down in the soil to form the root system.

  2. Plumule = It is the embryonic shoot system. During germination it begins to grow and form the shoot system; viz. stem,branches and leaves.

  3. Cotyledon/s = These are the godowns of reserve food that is required during germination. The stored food is largely in the form of starch, proteins and oils.
    All the pulses i.e. peas and beans are good examples of this; and that is precisely why they are cultivated by mankind.

  4. Endosperm = This is also a godown of reserve food for the same purpose mentioned above. It is mostly found in the cereals like rice,wheat, maize,oats and barley,and that is precisely why these are cultivated.Thus, a seed gets stored food for its growth from cotyledons or endosperm; but both these parts are never functional simultaneously. In those plants where the cotyledons store reserve food, the endosperm is non-existent,examples are all the pulses (see above)


    When the endosperm stores reserve food , the cotyledons are non-functional,examples are all cereals (see above).In short both of them are never functional in the same plant.


    The reserve food is just sufficient to let the seedling become independent. When the first green leaves appear it no longer requires the food from the godown.

The seed of a higher plant is a small package produced in a flower or cone containing an embryo and stored food reserves. Germination and early seedling growth require the mobilization of food storage reserves within the seed. A major portion of almost every seed consists of food reserves. Angiosperms fall into two groups regarding the placement of stored food in their seeds: the monocots which store most of their food in the cotyledons or seed leaves; and the dicots which store their food in extraembryonic tissues called endosperm (Gottfried, 1993).


Under favorable conditions, the seed begins to germinate, and the embryonic tissues resume growth, developing towards a seedling. The first step in germination of a seed occurs when it imbibes, or takes up water. Once this has taken place, metabolism within the embryo resumes (Gottfried, 1993). The part of the plant that emerges from the seed first is termed a radicle or young root—which anchors the seed and absorbs water and minerals from the soil (Gottfried, 1993). In some definitions, the appearance of the radicle marks the end of germination and the beginning of “establishment”, a period that ends when the seedling has exhausted the food reserves stored in the seed. Then, the shoot of the young seedling elongates and emerges from the ground. These are critical phases in the life of a plant. The mortality between dispersal of seeds and completion of establishment can be so high, that many species survive only by producing huge numbers of seeds (wikipedia.org, 2006).


Seed germination depends on a variety of environmental factors, the most important of which is water. However, other factors such as the availability of oxygen (for aerobic respiration in the germinating seed), suitable temperature, and sometimes the presence of light are also necessary (Gottfried, 1993).

Pumeria Characteristics

This page describes general observations and characteristics of cultivars of genus Plumeria. The plumeria genus is composed of five or more species although nearly all cultivars are considered part of species P. rubra or P. obtusa. We are concerned with the flower, the leaf, and the plant as a whole. There are certain characteristics considered when assigning to a species or in recognition of a variety. We document many of those characteristics for each variety in Cultivars and Varieties.

Growth Habit

Plumeria seem to have a fairly well defined growth habit, but will sometimes exhibit peculiar behavior. Compare plumeria to cats: they excel in doing things they are not supposed to do! Nearly every generally accepted rule of plumeria culture will from time to time be proven incorrect. For example: plumeria require full sun to bloom (what about the one in the garage in full bloom during the winter?); plumeria need to bloom in order to branch (What about this one with over 30 tips that’s only bloomed three times!)

Almost any part of a plumeria tree can be propagated by cutting, see How to Grow Plumeria from a Cutting for a procedure that will usually produce successful results. Though there are other ways to propagate plumeria; the plant whose habit we are describing was usually begun from a cutting, no matter how large or small.

The plumeria branch tip is where new growth including leaves and flowers occur. The branch and its tip are interesting since the tip is usually the same diameter as the rest of the branch. The young branch and its tip more closely resemble a broomstick than a young tree branch. The young branch and its tip are of a soft, but brittle, herbaceous material, full of the white milky latex plumeria sap. As new leaves are grown, the branch extends by adding tissue to the end of the tip. When an inflorescence (flower bud or stalk) is produced the tip divides into one or more new tips that continue to grow with as much vigor as the original tip. The new tips usually grow at a predictable angle with respect to the original branch tip. This is how a plumeria branches. Obviously, if it only divides into one new tip no branching has occurred. The normal branching habit, or average number of new tips produced, is probably two or three. This process continues indefinitely with each tip branching on the average once every year or two. The length of tip growth per year is based on factors including: variety, growing conditions, and nutrition. Once a particular bit of plumeria branch has dropped its leaves, it will never replace them as new leaves are always produced by new growth at the tip of the branch.

The plumeria’s annual growth cycle has evolved to accommodate a dormant period to coincide with months of drought in the arid tropical regions of Mexico, Central America, and Caribbean Islands where it is indigenous. This corresponds to the Winter season in the Northern Hemisphere and permits storing the plant indoors, out of light, out of sight, and out of mind when outdoor weather conditions are likely to include frost or freezing temperatures. While dormant, the plumeria requires no care and most varieties will loose all of their leaves.

As the sun’s intensity and temperatures increase during the spring, plumeria begin to break dormancy by producing leaves and an inflorescence on many tips. Many plumeria will be in full bloom before the spring rains and before producing a single leaf!

Active growth occurs after spring rains as long as temperature and sunlight requirements are met. Most vegetative growth occurs under these conditions. This includes revitalization or regeneration of a desiccated root system, new leaf growth, and stem and branch elongation. Many varieties will continue to bloom and initiate new inflorescence during the vegetative period. Most varieties will set seed pods during this period as well.

As fall approaches, drought, less sunlight, and cooler temperatures all contribute to plumeria entering its dormant period. Many lower leaves will turn yellow and drop, flowering will be significantly reduced or stop altogether, and overall plant growth will dramatically slow or come to a stop. The fully dormant plumeria’s requirements are few: temperatures above freezing and conditions on the dry side. Dormancy lasts from one to five months depending on environmental factors.

Characteristics Overview

Flowers

Plumeria flowers have five petals, although flowers with four, six, seven or more petals are not uncommon. Some types of flowers do not fully open and are referred to as shell, semi-shell, or tulip like. Most flowers have a strong pleasant fragrance that is most intense during the early part of the day. A great many different fragrances have been described, but since smell is so subjective and varies for environmental and nutritional reasons, we do not attempt to be comprehensive in its description. We try harder with colors. There seem to be several basic plumeria color schemes: white with a yellow center, yellow, multicolor, pink and red. There is speculation that red is a special case of multicolor. Most of the reds can be more properly referred to as red-purple.

Leaves

Plumeria leaves are generally green. What a surprise! However, when examined closely, they can exhibit remarkable variation that is species and variety dependent. We limit our leaf description to shape, color, size, and texture.

Plants

The plumeria is more appropriately considered a tree. In the tropics it can grow to heights over thirty feet. A mature plumeria has very strong hardwood and can be safely climbed by the average person so long as the limbs are at least three inches in diameter. Remember to keep your weight where the branches intersect or be sure there are plenty of cushions below!

We are concerned about the general growth habit of a plumeria variety, how well it branches (IE what is the usual number of new tips produced from a tip when it blooms), its history, its seed bearing potential, and its use as a container, ornamental, or landscape plant.

Characteristics in Detail

Flowers

Measurements of plumeria flower varieties are with respect to other plumeria. When a universal standard can be applied, such as a ruler or color chart, we use it; otherwise the comparison is among peers.

    • Petal Colors: We have done our best to obtain the closest color possible using state-of-the-art desktop digital imaging hardware and software in the production of the images we present.
      Please remember: ambient temperatures play a significant role in the intensity of the plumeria red and red-purple pigmentation. For the most part, our images were made in California and Hawaii when ambient temperatures ranged from 70°F to 90°F. In Florida and Texas when ambient temperatures range from 80°F to near 100°F, expect the red-purple pigments to be significantly exaggerated. We will be adding more images from around the world as time permits.
    • Size: The size of the flower recorded represents an average floret. It has been stretched out to its maximum width without risking pulling it apart. The distance between the two most distant petal tips is then measured. Please be aware the this average can be off by as much as 100%! A great deal depends on the plant’s maturity, environment, and the point in the flowering cycle. Many varieties will produce larger flowers early in the flowering cycle.
    • Petal Texture: This is a subjective measurement of how one variety’s flower measures up to another. When the measurements were taken, we used a zero to three scale, with zero being fragile, one being delicate (typical of most plumeria), two being strong, and three being rigid. Generally strong and rigid flowers will last longer and be somewhat better lei flowers than those described as delicate.
    • Fragrance: This is a very subjective measurement. Most plumeria enthusiasts know what a plumeria smells like. It smells like a plumeria! What a surprise! The scent is wonderful, but indescribable. Sometimes we call it floral sweet and other times we describe it as simply plumeria. When another description can be applied, in our opinion, we use it.
    • Intensity of Fragrance: Another subjective measurement, made within the context of plumeria. We rated each variety on a zero to three scale. Zero was used when we could detect no fragrance, one for a light to mild fragrance, two for moderate to strong, and three for heavy.
    • Tendency to Fade: When a difference is noted in the colors of older flowers compared to newer flowers on the same plant, it is usually due to bleaching by the sun’s ultraviolet rays. We refer to this effect as its tendency to fade. Fading is most apparent in the red-purple pigments, but can also effect the pinks and yellows. We rated this tendency as: none, slight, moderate, or dramatic.
    • Petal Type: Petals are described according to their overall shape, their tip, and any unusual characteristics they may possess. Plumeria petals fall into either elliptical, obovate, and rarely spatulate categories. They can be further described as wide or narrow. Occasionally, we find petals with other characteristics such as reflexed or twisted. Petal tips are described as round or pointed. When we get the illustrations in place this will be much clearer.
      • Elliptical: The widest part of the petal is close to the middle.
      • Obovate: The widest part of the petal is close to the tip.
      • Spatulate: Special case of obovate, where the petal is spoon shaped.
      • Wide: Petal somewhat round.
      • Narrow: The petal is more than four times longer than it is wide.
      • Reflexed: The fully open petal will nearly form a semi-circle where its tip may be pointing down or back to its base. See Singapore for an example.
      • Twisted: The petal is convoluted in any of a number of ways that give a curled or even a fluted appearance. See Madame Poni or Celadine for examples of twisted and fluted.
      • Round tip: The tip does not come to a point.
      • Pointed tip: The tip comes to a point. Sometimes we use somewhat pointed where the tip appears pointed, but may also be considered rounded.
  • Flower Type: This description applies to the plumeria blossoms that fail to open or open in a peculiar way. Some varieties frequently will not open into a flower, but remain as a partially open bud resembling some types of small spiral seashells; these are referred to as shells. Others open more fully than shells but not fully retaining a cupped or tulip like appearance; these are referred to as semi-shells. Since most plumeria florets open fully, this description is only used for those that do not.

Leaves

The emphasis is on the flower. There are, however, some interesting items observable in plumeria leaves that can aid in identification of varieties in or out of bloom.

    • Color: It should be no surprise that most plumeria leaves are described as green. There are, however, variations of green; some showing a purplish tint or even a blackening. Generally, we describe them as simply light green, or green unless there is really some other aspect worthy of note.
    • Texture: A measurement of plumeria leaves usually describing how rigid the leaf is compared to other varieties of this species. Since this measurement is probably influenced by environmental factors, it should be taken with a grain of salt. Generally we will describe the leaf as flexible or rigid depending on how easily it is bent. Consider a leaf held by its petiole (stem) being waved back and forth slowly through the air, one that shows significant distortion from its plane from air resistance is described as flexible, one that retains its shape is described as rigid. Since nearly all plumeria leaves can be described as glabrous (smooth and not hairy (pubescent)), we only mention the rare exceptions. The bottoms of nearly all plumeria leaves are also considered glabrous, even though they are bumpy with exaggerated veins.
    • Leaf Border Color: The extreme edge of the plumeria leaf may show some color other than green, frequently red. This may be an indication of the variety’s heritage.
    • Petiole Color: The petiole is the leaf stem. It is usually green or green with a reddish tint. This may be an indication of the variety’s heritage.
    • Leaf Shape: We are concerned with the shape, size, and type of tip of the plumeria leaf. This may be an indication of the variety’s heritage and can aid in identification. Plumeria leaves are described as elliptic , oblanceolate, and rarely lanceolate. These descriptions can be refined as wide or narrow as necessary. The tip of the leaf is described as acuminate, acute, or obtuse.
      • Elliptic: The widest part of the leaf is near its center.
      • Oblanceolate: The widest part of the leaf is nearer its tip than its center.
      • Lanceolate: The widest part of the leaf is nearer its petiole than its center.
      • Acuminate: The curve of the leaf edge will abruptly change as it narrows near its tip.
      • Acute: The curve of the leaf edge will not significantly change as it narrows near its tip.
      • Obtuse: The leaf will have a very blunt tip that does not usually come to a point.
    • Leaf Length and Width: A typical mature leaf is measured. The measurement does not include the petiole. The width is measured at its widest point. While no studies have been performed to our knowledge, the ratio of length to width may be more significant than the length and width measurements themselves.
  • Varigation: A few plumeria varieties will show light to moderate random changes in the coloration in different random areas of a single leaf. This is referred to as varigation. Since it is so unusual it is only mentioned when observed.

Plants

Measurements and observation of the overall plumeria tree are interesting as they can relate to its suitability as an ornamental, container grown, or a landscape plant. They can also be of interest for growers for their genetic information and possible use in hybridization.

    • Pollen Parent: The name of the male parent if known.
    • Seed Parent: The name of the female parent if known.
    • Deciduous or Evergreen: Deciduous plumeria usually drop most if not all of their leaves during a dormant period. Evergreen plumeria either retain most of their leaves while dormant or do not experience an annual dormant period. In the sub-tropic climates where evergreen plumeria are stored indoors for the winter, most evergreen varieties do go dormant and do drop their leaves.
    • Seed Production: This is based on our experience, observation, and advice from others. Seed production is rated as: none observed (not known to had ever set seeds), rare (once), seldom (unusual but occasional), average (at least once a year), or profuse (much more than average). It relates to how many seed pods will be produced by a mature specimen under ideal conditions.
    • Branching: Based on the observation of how many new tips grow after an inflorescence is produced. For this measurement we examine a specimen of the given variety and note how many new tips are usually produced. This frequently falls into the range of one to five to which we apply our opinion of the variety’s branching habit:
      • Poor:
      • Fair:
      • Good:
      • Excellent:
    • Growth Habit: This is a subjective description of our opinion of the plants stance. Since this is probably influenced by environmental and nutritional factors, it should not be taken too seriously.
      • Dwarf: Refers to the shortest and most compact growing of the plumeria with small leaves and usually small flowers.
      • Compact: Usually a smaller plant with better branching habit and minimal stem elongation before blooming and branching again.
      • Upright: Refers to the attitude of the plant. More specifically, to the angle that new tips emerge from an old tip after blooming. The angle is the wide angle that the new tip makes with respect to the original branch. When this angle is wide, the plant appears more upright. For example, if a new tip emerged at a 180° angle from the original tip, it would be in perfectly straight allignment with it. No plumeria exhibit this characteristic, except in the case where the plumeria blooms without branching. Yet, the closer this angle approaches 180° the more upright its character. An upright plant is considered the opposite of a rangy plant.
      • Rangy: Refers to the attitude of the plant. More specifically, to the angle that new tips emerge from an old tip after blooming. When the angle is narrow, sometimes approaching 90°, the plant takes on a rangy appearance. This characteristic is exaggerated when the new branches curve, sometimes down, before blooming and branching again. Rangy plants frequently have significant stem elongation before blooming and branching again. A rangy plant is considered the opposite of an upright plant.
      • Lanky: Usually a larger plant with more stem elongation before blooming and branching again. Normally applied to upright plants rather than rangy plants since rangy plants frequently exhibit this characteristic.
      • Dense: Refers to the relative closeness of branches to each other and can be used with other growth habits in seemingly contradictory ways such as Rangy, dense. This is a subjective opinion rather than a measurement
      • Trunk Circumference: This measurement is taken approximately 300 cm from the ground. It is provided to indicate the relative maturity of the specimen examined.

The Standard Reference

The standard reference used is The Royal Horticultural Society Colour Chart . The society is recognized worldwide and presumably their color chart is available worldwide. See Obtaining the standard reference below to acquire a copy of the color chart.

Using the Standard Reference

The color chart should always be used in daylight, not in direct sunlight, but a bright shady spot. Most plumeria reds will be found in Fan 2 in the Red-Purple Group.

Start by selecting the blossom to be examined. It should be fully opened, but not so old that significant fading has occured. Usually this will be one or two days after it begins to open. Certain varieties will have already have begun to fade; this can not be helped. Start by tearing a single petal from a plumeria blossom. Lay the petal on a clean sheet of paper top side up and petal tip pointing to the top of the sheet. Draw its outline with a pen or pencil. Flip the petal over someplace else on the same sheet and repeat this process. Examine the petal closely, determine its significant areas of banding, striping, and differing colors. Without getting too carried away, draw those areas within the petal outlines on the sheet of paper. Many plumeria blossoms possess some of these characteristics:

  • Top side of petal from left to right
    • Slight to pronounced curl
    • Color intensification from the left to right side
    • Red pigment granularity decreasing from left to right
    • Stripe of color on the right side
    • Color shifting from yellow to white from base to tip
  • Bottom side of petal from left to right
    • Stripe of color on the left
    • Subsequent bands of lessening color intensity, becoming grainy
    • Tendency for color shifting to white toward to right petal tip
    • Tiny patch of yellow or orange at the extreme right base

Using a pair of scissors, cut the petal into pieces containing only one significant color. Don’t attempt to get every graduation of color, just two or three areas of different, representative, and uniform color. Perform this process for the top and bottom of the petal.

Dealing with a single piece of petal at a time, flip through the fan that probably contains the matching color. Use a “narrowing down” process of elimination by selecting several close matches, then finally choose the one that seems to be the best match. An exact match is a rare occurrence. Keep in mind that hue is more important than intensity. Annotate the drawing with the color chart code for that petal area. An example color chart code would be Red-Purple 61A.

After all areas are marked, the petal is described in narrative form incorporating the appropriate color codes. Color descriptions used in Cultivars, and varieties use this technique.

Obtaining the Standard Reference

The Plumeria Place has no affiliation with the Royal Horticultural Society. This information is believed to be correct, but can not be guaranteed. Given the aforementioned, the Colour Chart can be obtained by snail mail order. The cost is about $35.00 US and it is believed Visa and Master Card are accepted. Send request and credit card information to:

RHS Enterprises
Wisley, Woking,
Surrey. GU23 6QB
England

What is a Plumeria Center Cut?

Center Cuts are an often-overlooked cutting that deserves a place in your garden! A center cut is a branch or branches without any growth tips. Treat center cuts as you would any cutting. When a center cut is planted buds will form towards the of the cutting from old leaf nodes and a new growth tip will form. Often several new tips will appear!

Because the single cutting forms multiple tips so quickly, center cuts are sometimes preferred to single tip cuttings. Another benefit to center cuts is the diameter is typically much larger than a tip cutting because of its age. It will makes a larger tree base than a tip cutting in less time.

Very few sell center cuttings because of the perceived value of center cuts. The lack of the smooth growth tip makes them less physically attractive at first – but given time! A center cut will produce a fuller plumeria tree in a shorter time.

Plumeria Fragrance

Hawaii Cooperative Extension Service

Horticulture Digest #102

WHAT IS THE TRUE PLUMERIA FRAGRANCE?

In the proof-reading phases of the University of Hawaii’s Plumeria Cultivars in Hawaii bulletin 158, the editor disagreed with the authors on the nature of the fragrance of several of the plumeria cultivars. It brought to mind the differences that people come with in describing odors. Plumeria flower fragrances can be described as weak, mild or strong, with the strongly scented ones characterized in terms of other fragrances: citrus, coconut, rose, cinnamon, carnation, jasmine, gardenia, fruity, or even woody.

RESULTS

‘Common Yellow’

In ‘Common Yellow’ 73 different compounds were identified by comparing their mass spectra and GC (gas chromatography) retention times with those of reference chemicals, while 67 were identified in ‘Irma Bryan’. It is possible that differences such as thes e could be used sometime to help distinguish between other cultivars which are closer in appearance.

‘Common Yellow’ has as major components the compounds phenylacetaldehyde and linalol (16.1 and 14.1 percent, respectively). Also present are:

  • trans, trans farnesol (11.0%),
  • beta phenylethyl alcohol (8.8%),
  • geraniol (5.4%), and
  • alpha-terpineol (2.8%).

Two other compounds, neral and geranial, with lemon-like fragrances were present (comprising together 0.9%) which help account for the characteristic citrus scent of this flower.

 ‘Irma Bryan’

‘Irma Bryan’ had a very different makeup, although phenylacetaldehyde (12.1%) was still present. Beta-phenylethyl alcohol comprised 31.6% of the essential oil, about 3 times as much as in ‘Common Yellow.’ It has a mild, warm, rose-honey-like odor. The phe nylacetaldehyde has a powerful and penetrating, pungent-green, floral and sweet hyacinth-type odor.

Other volatiles that were present in the ‘Common Yellow’ flowers were either absent or present at much lower levels in ‘Irma Bryan,’ while methyl cinnamate (1.0%) and 2-methylbutan-1-o1 (10.5%) were found in the red ‘Irma Bryan’ flowers and not in the ‘Co mmon Yellow.’ Methyl cinnamate has a powerful fruity-spicy odor and seems to characterize ‘Irma Bryan’ while the 2-methylbutan-1-o1 does not seem to contribute to its scent.

Does it make the wonderful plumeria fragrance the less exquisite to know that 12 hydrocarbons, 21 alcohols, 13 esters, 8 aldehydes, and 20 miscellaneous compounds were detected?

So, when asked what creates the wonderful plumeria scent, you can reply authoritatively and quote the chemical names. On the other hand, you can paraphrase Joyce Kilmer and state that only God can make a plumeria.

EXPERIMENT

In the summer of 1991, Japanese researchers collected plumeria flowers in Hawaii to analyze them. The cultivars chosen were the ‘Common Yellow’ and ‘Irma Bryan’ forms of Plumeria rubra L.

Nearly a pound of flowers of each cultivar were subjected to steam distillation and extraction with organic solvents to derive a mere 70 milligrams (0.002 oz) of essential oil. Gas chromatography and mass spectrometry analyses were carried out to characte rize the various volatile components.

References:
Chinn, J. T. and R. A. Criley. 1983. Plumeria cultivars in Hawaii. HAES Research Bulletin 15 8. (Out of Print)

Omato, A., K. Yomogida, S. Nakamura, S. Hashimoto, T. Arai, and K. Furukawa. 1991. Volatile components of plumeria flowers. Part I . Plumeria rubra forma acutifolia (Poir.) Woodson cv. Common Yellow. Flavour and Fragrance Journal 6:277-279.

Omato, A., S. Nakamura, S. Hashimoto, and K. Furukawa. 1992. Volatile components of plumeria flowers. Part II. Plumeria rubra L. cv. Irma Bryan. Flavour and Fragrance Journal 7:33-35.

Richard A. Criley, criley@hawaii.edu
Department of Horticulture
University of Hawaii

Roots and root hairs

Roots are one of the most important parts of the plant for taking up nutrients and water. For some growers, they are so important that they always check the root system before watering.   By Pieter Klaassen CANNA Research 


The foundation


Plants need roots in order to stay upright and not to be blown over by the wind. Water and nutrients also enter the plant through the root system.


The root system will continue to increase in volume for as long as the plant as a whole, including the foliage, continues to grow. When a certain equilibrium has been reached, the plant will simply maintain its volume, and cease to grow. Even in this state of equilibrium, the roots continue to grow, but will die back partly as well. To understand this better, we will have to divide the root system into parts.


The root system


The root systemAs mentioned, the root system will only increase in volume for as long as the rest of the plant continues to grow. However, transpiration from the leaves can also cause more roots to form in order to pump up the water needed. In the end, an equilibrium is established between the roots and the plant. A general rule of thumb is that the root system should comprise 30% of the total plant volume. Although this rule applies fairly consistently to plants in the open air, in substrate culture this does not always have to be the case. You can grow large plants in small pots as long as you supply them with water and nutrients and do not allow the pot to get too dry or too wet. To reduce the chance of this happening, we advise a large medium volume.
In hydro cultures you will also see that fewer roots are needed in order to grow a larger plant. This is because each root hair is able to absorb more water and nutrients. This is one of the reasons that hydro culture has the potential to produce higher yields.


Root hairs

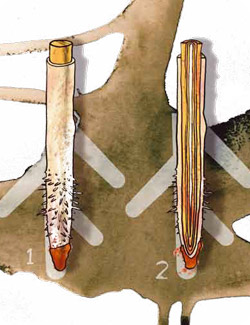
Root hairs
Root tip and a cross section of the root tip

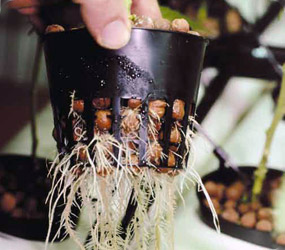
The root hairs are where most of the nutrients and water are absorbed. The root tip produces new cells on a daily basis, and thus also root hairs. When the plant is short of water and/or nutrients, it will devote more assimilates (photosynthesis energy) to producing more cells in the root tip. This also generates more root hairs until the root has found what the plant needs (more water or nutrients). The oldest root hairs will then die off.


In practice, as the medium gets drier, the root starts looking for water and will produce more cells, and thus more root hairs. Absorption capacity increases, because more root hairs are produced. But the youngest root hairs will enter even more “moist” soil. The plant can still take up water and sometimes even more! This is why the general advice is to grow on the dry side: when you water, some of the root hairs become redundant. To limit the energy-loss (dissimilation energy), the oldest root hairs will die off.


If you give the plant too much water, all the root hairs will die off. Effectively, the roots drown and it takes at least three days before a root tip has produced enough new cells with root hairs. The dying off of root hairs also happens after repotting the plants or after moving them very roughly. So when this is the case, go gently on your climate control the first 3 days.
And pay good attention to the watering: don’t overdo it but on the other hand, don’t let the plant dry out too much.


The root


Unlike the root hairs, the roots themselves are visible to humans. The root cells, without root hairs this time, will stretch to enable the propulsion of the youngest part of the root forwards. The outermost cells of the root suberise (form a hard surface, like the bark of a tree), after which they only serve as a pipeline to transport the water and nutrients absorbed towards the stem and the rest of the plant.

Plants in the vegetative phase will increase in weight, both above and below the ground. Even in the first stage of the generative phase, the leaf surface area will increase and an active climate will cause the roots to increase in volume. Eventually, an equilibrium will be reached. This maximum equilibrium usually comes when around 50% to 70% of the flowering period has elapsed (for example, week 6 of a 10-week growing cycle).

In potting mix cultures, the plant can absorb 5 to 6 litres of water/m2 per day. But in hydro cultures more water can be absorbed with fewer root tips (but not fewer root-hairs!).


Root tips


At the end of every root is the root tip. The root tip consists of a root cap and a growing point. The root cap is very hard and protects the growing point. It is so hard, in fact, that it can break and grow through asphalt if the cap has enough energy.


In the growing point behind the cap, new cells are created. The most important plant hormones are also produced here. These will not be discussed in this article. For more information on plant hormones, please see CANNAtalk 9. It is these new cells that cause the roots to grow further through the medium. The roots are able to do this not only because new cells are created, but also because the existing cells are stretched. The first cells also contain bulges, called root hairs.

Root zone temperature and plant health

There are many aspects of crop and plant production that are critical for the success of the effort. One of the most often overlooked and seldom allow ed for aspects of production centers around the temperature of the root zone. After all, it is out of sight and there is not much that can be done about it. Besides, it must be OK to hold the entire plant at the same temperature, right? Wrong; and here is why.